Skip to Content
Radiator Surround
CycleKarts

Radiator Surround

Made a start on making the radiator surround

It's been a long time since I did any work on the Cyclekart. The house build is still ongoing, I still haven't got the roof on the carport and work has a tendency to consume unreasonable amounts of time. So any plans that I put in place to do work on the Cyclekart always seem to get pushed aside at the last minute when something more important crops up.

So with the upcoming Yesterdays Power Rally event coming up next weekend, I thought that it was about time I thought about putting some bodywork on the Bentley and so have blocked the entire week out to work only on the cyclekart.

First order of business

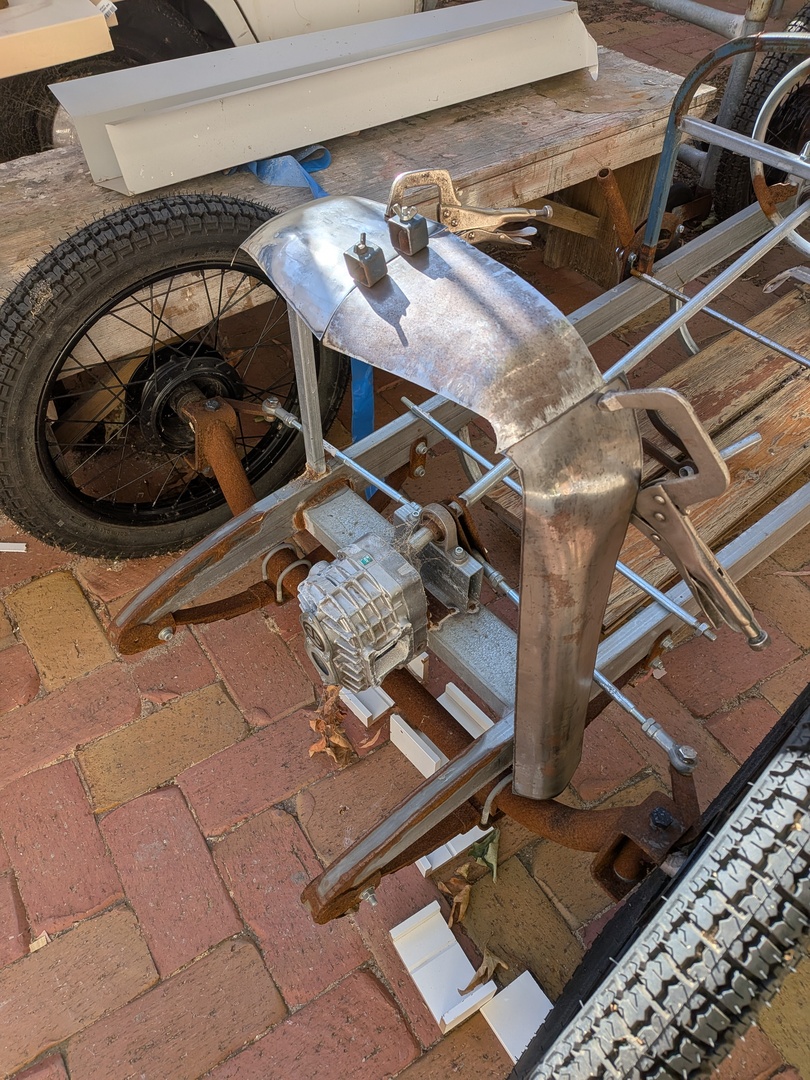
So the first thing that I wanted to do is to get the radiator surround sorted. It's definitely the most complex part of the bodywork and maybe the most important, as it sets the entire aesthetic of the car. Get it wrong and it won't look like a Bentley. 

I decided that I would make the surround from steel as it's something that I'm used to working in, and maybe I could get it chrome plated down the track. Steel is pretty forgiving when it comes to metal shaping, more so than aluminium, but it is a lot harder to work.

I could not find a pattern for a Bentley surround, but did find some photos of one being made. The shop that made it also had some photos of a Jaguar SS Surround with the flat parts in front of it, so I used these as the basis for mine. 

463424780_3252449981557625_8002991232443875378_n (1).jpg

With a little jiggery-pokerey i managed to draft up some patterns in cad

Screenshot 2026-01-11 at 1.35.11 pm.png

Which I then cut out on the plasma.

PXL_20260111_044444897.MP

There's four parts in total, two top parts (left and right) and two sides

PXL_20260111_043621409

Differences


The SS Jag surround is a little different to the Bentley surround in that it folds back under itself to form a recess where the grille mesh sits, whereas the Bentley has a trim attached to the front which protrudes outwards. 

104706988_869617996893652_4688973777927048507_n.jpg
After adding some shape to one of the top parts and test fitting, it was apparent that the angled part of the pattern,  which would normally tuck back on itself to form the lip at the centre was not going to work.

PXL_20260111_051644869.MP

So I decided to cut the edge straight and see if that made things line up a bit better

PXL_20260111_053904531

Moving Metal


I added some crown to the panel using a blocking hammer. An interesting technique which looks like you've ruined the panel...

PXL_20260111_062048593

PXL_20260111_062101310
But is easily rolled out using the english wheel....

PXL_20260111_062446670.jpg

I also added some shrinking tucks to the front edge to pull the front edge downwards

PXL_20260111_064321581

TIP: The trick here is to 'trap the tuck' by hitting the 'root' of the fold. This captures the top of the 'pleat' and then allows the remaining metal along the pleat to be planished into itself, 'shrinking' the metal along the edge. It's a simple technique which anyone can do using a home made 'tucking fork'.

And so after replicating the same on the other side, I ended up with something that looks like this...

PXL_20260111_071144135


Thoughts and contemplations


I'm pretty happy with the top. The corner, like the angled part that I removed earlier needs to be adjusted, but I'll trim it after welding. I also made a quick start on the side piece, I added a bit of crown to to front top corner and formed the sides over a large piece of tubing. It still needs a bit of work to shrink the front top corner and trim the bottom to sit over the chassis, but there's a lot less work in this than the tops.

PXL_20260111_071225161

PXL_20260111_071412144.MP


PXL_20260111_071407515.MP

I'm pretty pleased with how it's turned out so far. If I had more time I'd make a new pattern from this and make a better mk2 version as there's definitely some improvements that can be made to the shape, but I think it will be passable.

Tomorrow I'll finish off the sides and make up the bottom part. The bottom is pretty straightforwards and consists of a closing panel that goes up and over the blower. The plan is to cut this from 6mm steel to give the impression that it's intricately formed from 1mm...


152087527_2125936707542297_6150170144934942676_n.jpg


Comments

Log in to leave a comment.