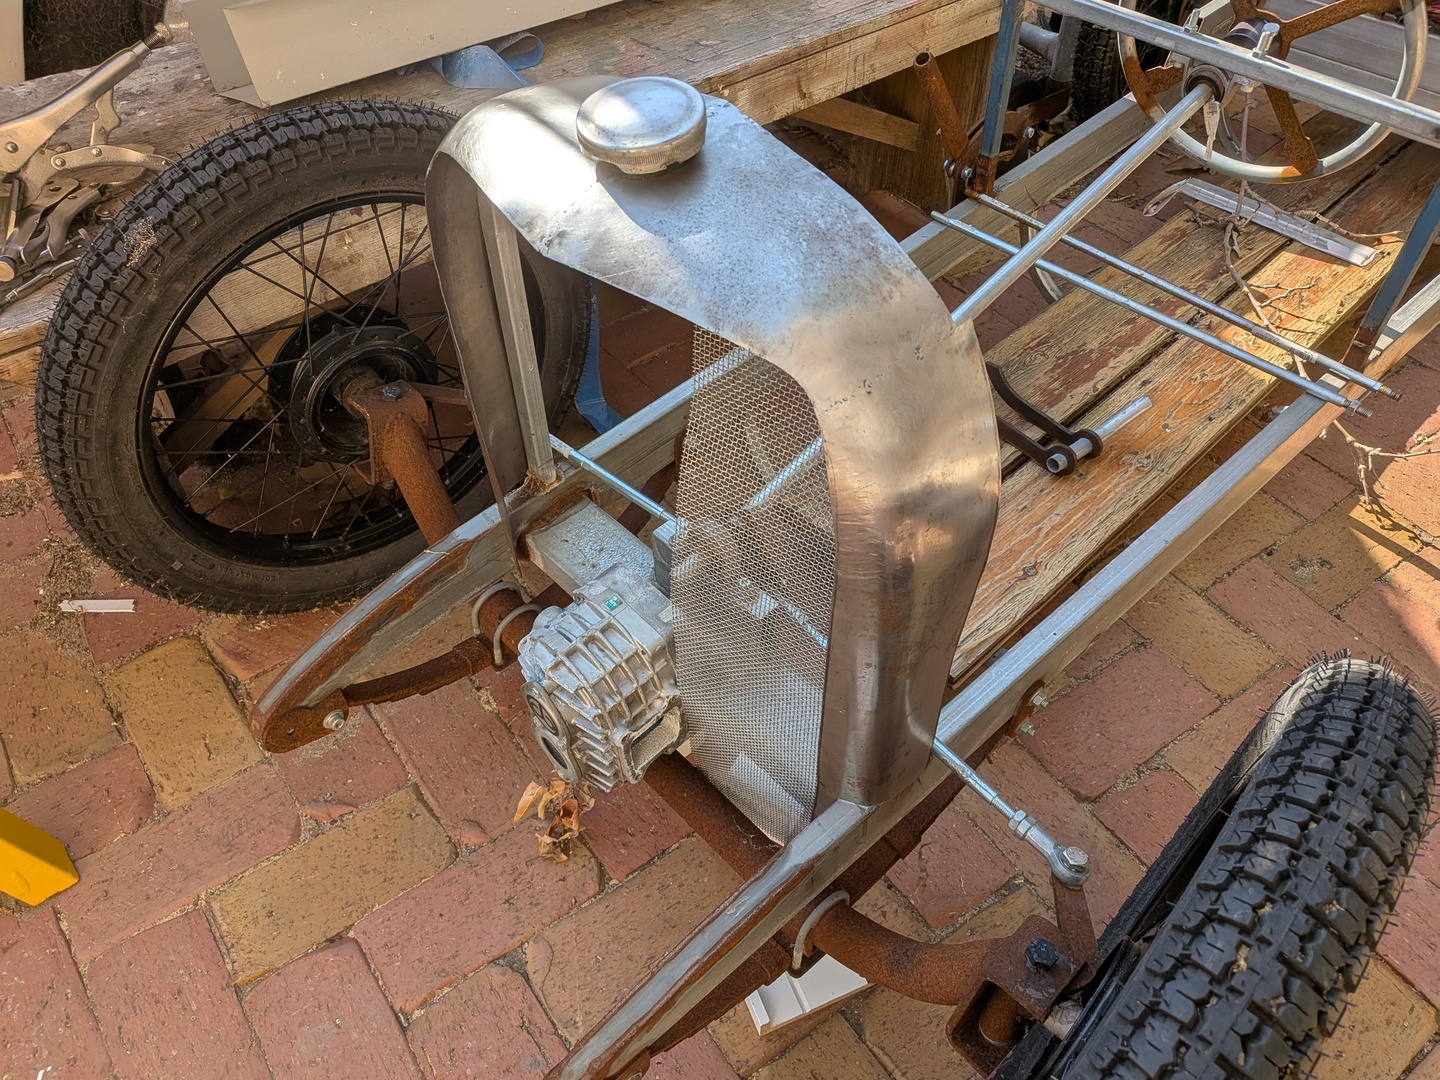

So spent today fettling and welding and managed to get the radiator shell to the point where I can move on to the next item. It's not 100% finished as it needs planishing and trimming but the shape is kinda there and it's all in once piece.
So the first order of business today was shaping the side panels. These had a fair bit of crown to the 'shoulders' and required both raising with the blocking hammer and shrinking with the tucking fork.
I think that ideally the shape would be split between the top panel and the side panel, but as the pattern was not ideal most of the shape ended up at the top of the side panel.
Welding
The panels are butt joined (edge to edge). This allows the welds to be planished to prevent distortion.

Welding panels without distortion is pretty straightforwards, if you know the technique...
TIP: You cannot use a MIG welder when metal shaping as the heat-affected-zone (HAZ) of the weld is too hard to planish or file. You must use TIG, or preferably oxy-acetelyne.
- Clamp the panel at one end of the weld making sure that the panels are aligned.
- Make a small tack weld
- Allow to cool
- You will see that the ends of the panels are pulled together (see image above). This is due to the HAZ cooling and contracting causing the join to distort.
- Using a hammer and dolly planish the weld (just two or three sharp taps right on the weld is usually enough). If it is a small panel you can flip it over and use an anvil or flat top part of a vice as the dolly. This saves needing a third arm or an accomplice.
- Planishing the weld releases the tension from the HAZ and allows the panel to re-align (see image below)
- Continue on in this manner with tacks approx 1" apart until the panel is completely tacked.

- Once the panel is completely tacked up, you can then go back and weld in between the tacks.
- Be careful when welding near to the edge of the panel as it is easy to put too much heat into it causing the edge of the metal to melt back. You can prevent this by using a copper heat-sink. A flattened piece of copper pipe makes a great heat-sink. Just clamp it to the backside of the panel. The weld will not stick to the copper. (you can also fill holes using the same method)
One side down, one to go...

So with one side welded together I trimmed back the inside corner to blend a bit better and offered it up on the car. I also trimmed the bottom to fit over the chassis rails.
I then spent some time filing the weld to blend the panel together. This still needs some further planishing and sanding which I'll do when i do the final finishing.
With one side down I set about replicating the same shape in the opposite side panel. This did not take too long as I just went hard at it replicating the same blocking and tucking that I had done on the first side, dispensing with the many trail fits and fettling I did first time around.
Offering up the panels I scribed the panel joins as there was a little overlap. I then trimmed the panels to suit before welding the side to the top and then the two halves together.

Finishing touches
No radiator would be complete without a radiator cap. I tried a few different bits of pipe and other things I had laying around, but nothing looked quite right. So a quick scavenge through the parts bin turned up an old VW fuel filler cap from my speedster project. I had kept the cap and filler neck which I had cut off to fit a flip top style filler cap

Of course having a VW logo on a Bentley just isn't cricket, so I took the cap apart and planished the logo out to leave it smooth.
I may press a 'B' in there at some point but most of the cars of this era had either a hex style top, often with a flying B or in the case of the le-mans cars a lever operated filler.
So after cutting down the filler neck I had a trial fit with some mesh I had laying around the workshop.

I think that the mesh is too fine. I actually bought this for some carburettor screens for the speedster, but it would be passable. The mesh gets painted black and has the number painted on in white as per the original, so kinds disappears, but the original cars had a course woven mesh which just looks nicer.

I did managed to find a source for some of the correct style woven mesh, but it is pretty expensive as it is from a specialist mesh supplier. I'm hoping to stumble across a cheaper alternative. Fingers Crossed.
I still have to trim the back and swage a recess at the back edge as well as cut the bottom trim out, which is tonights job so that I can cut it out tomorrow.