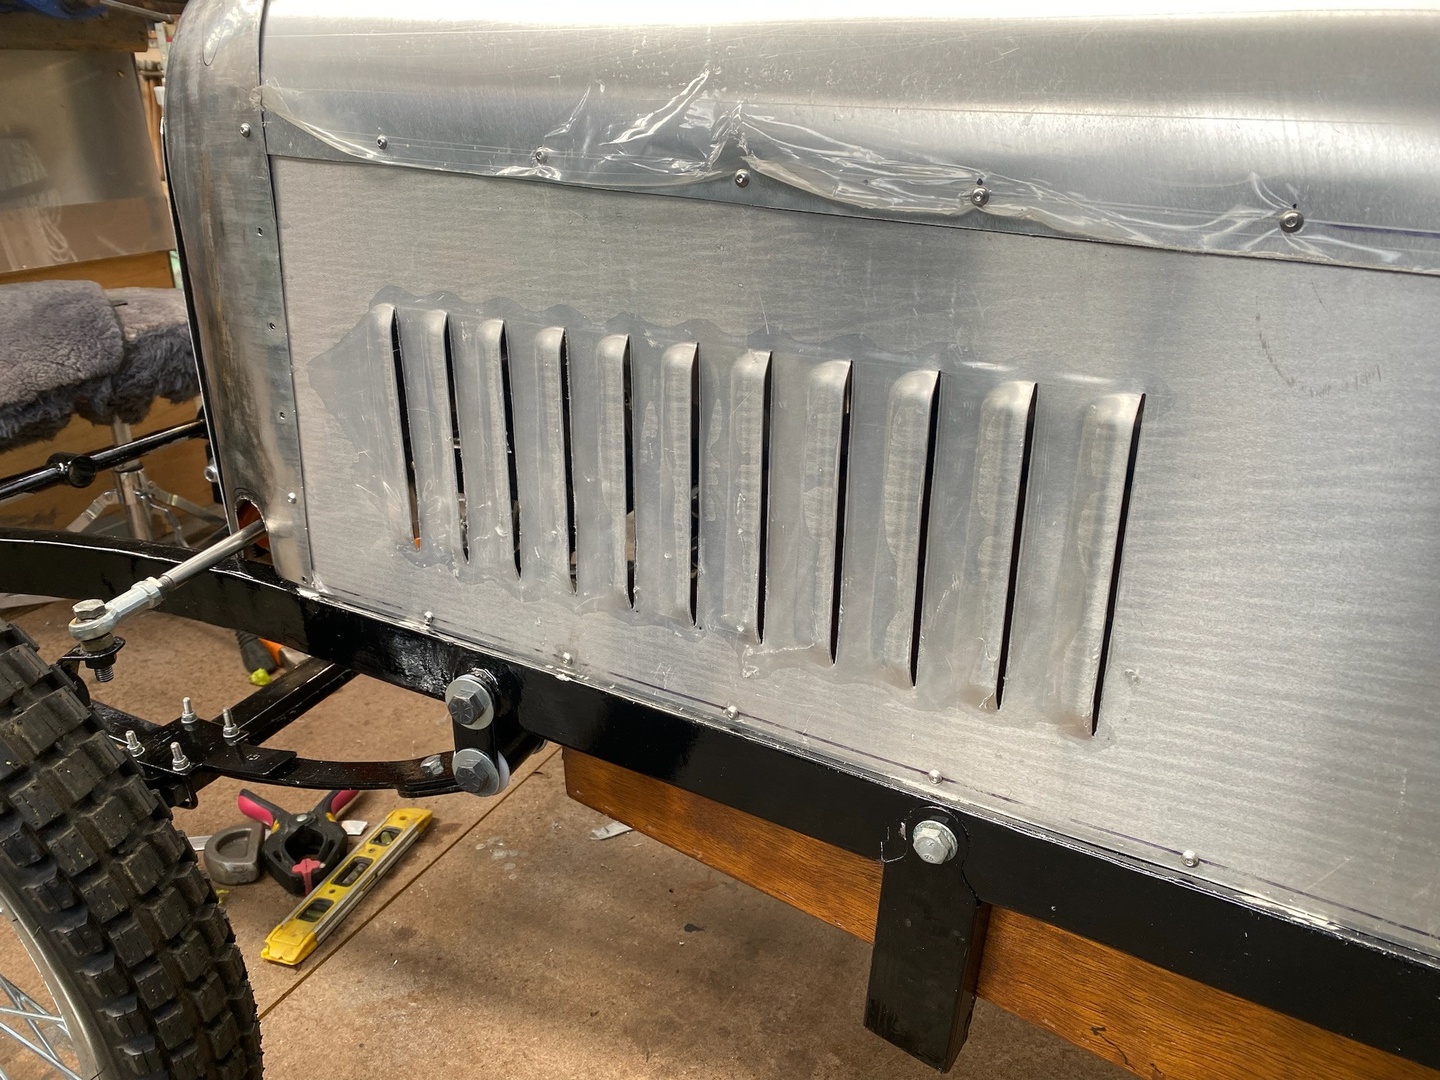
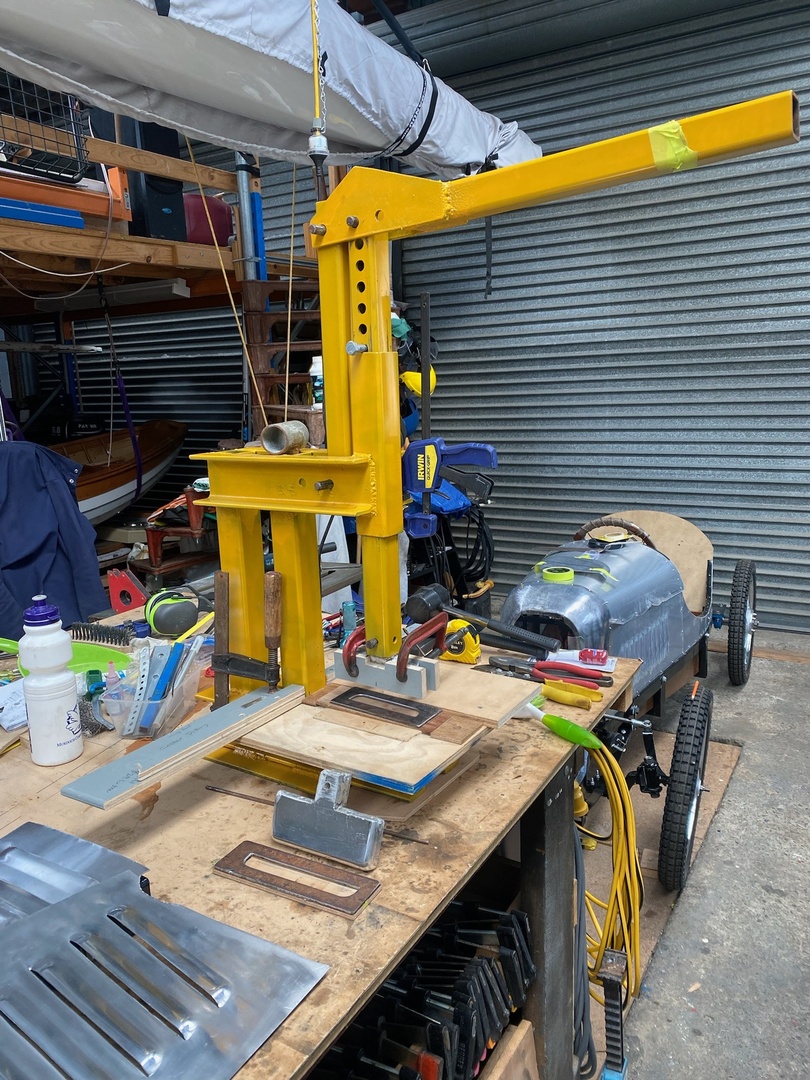
Bonnet louvres
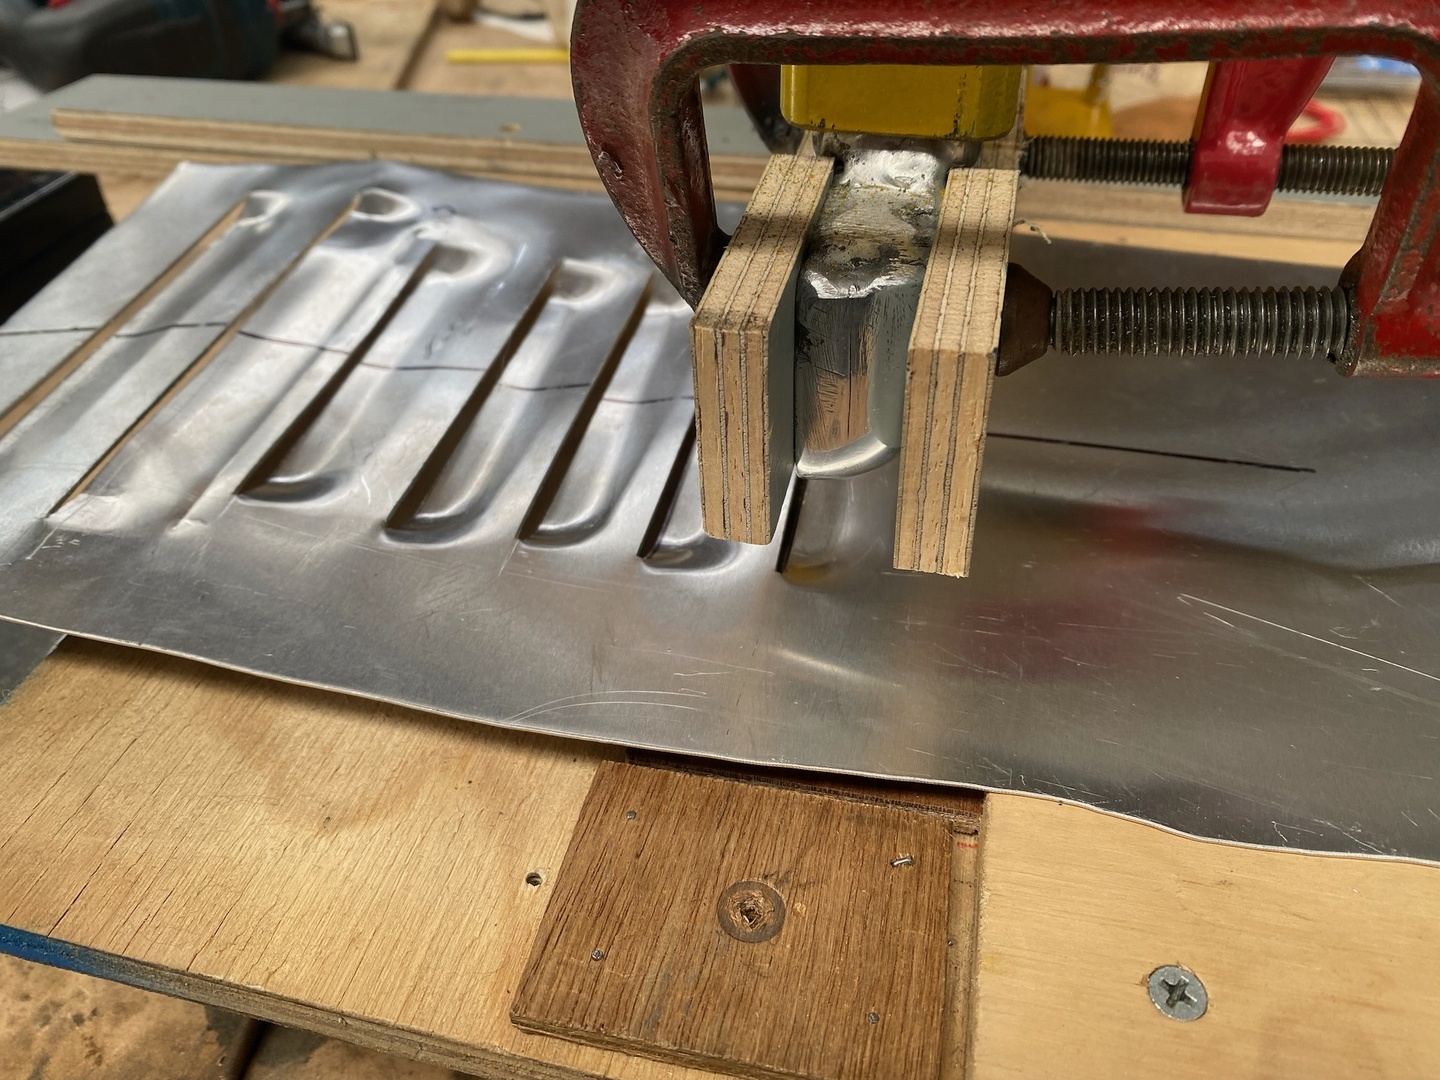
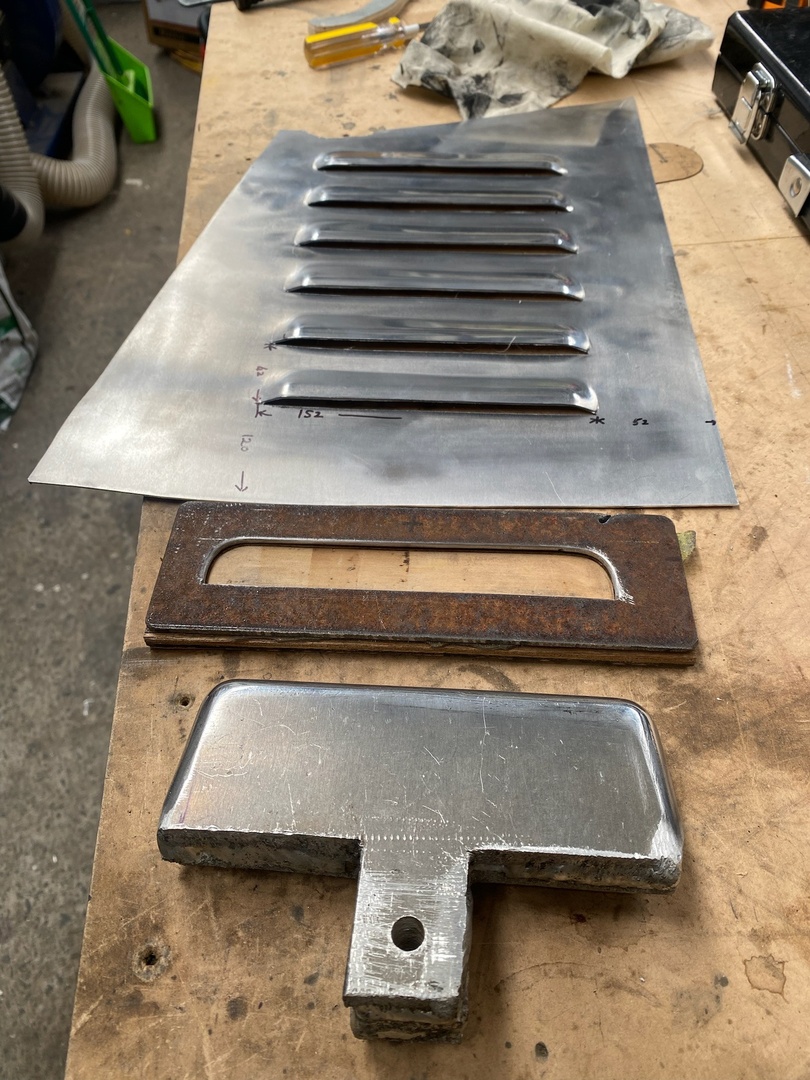
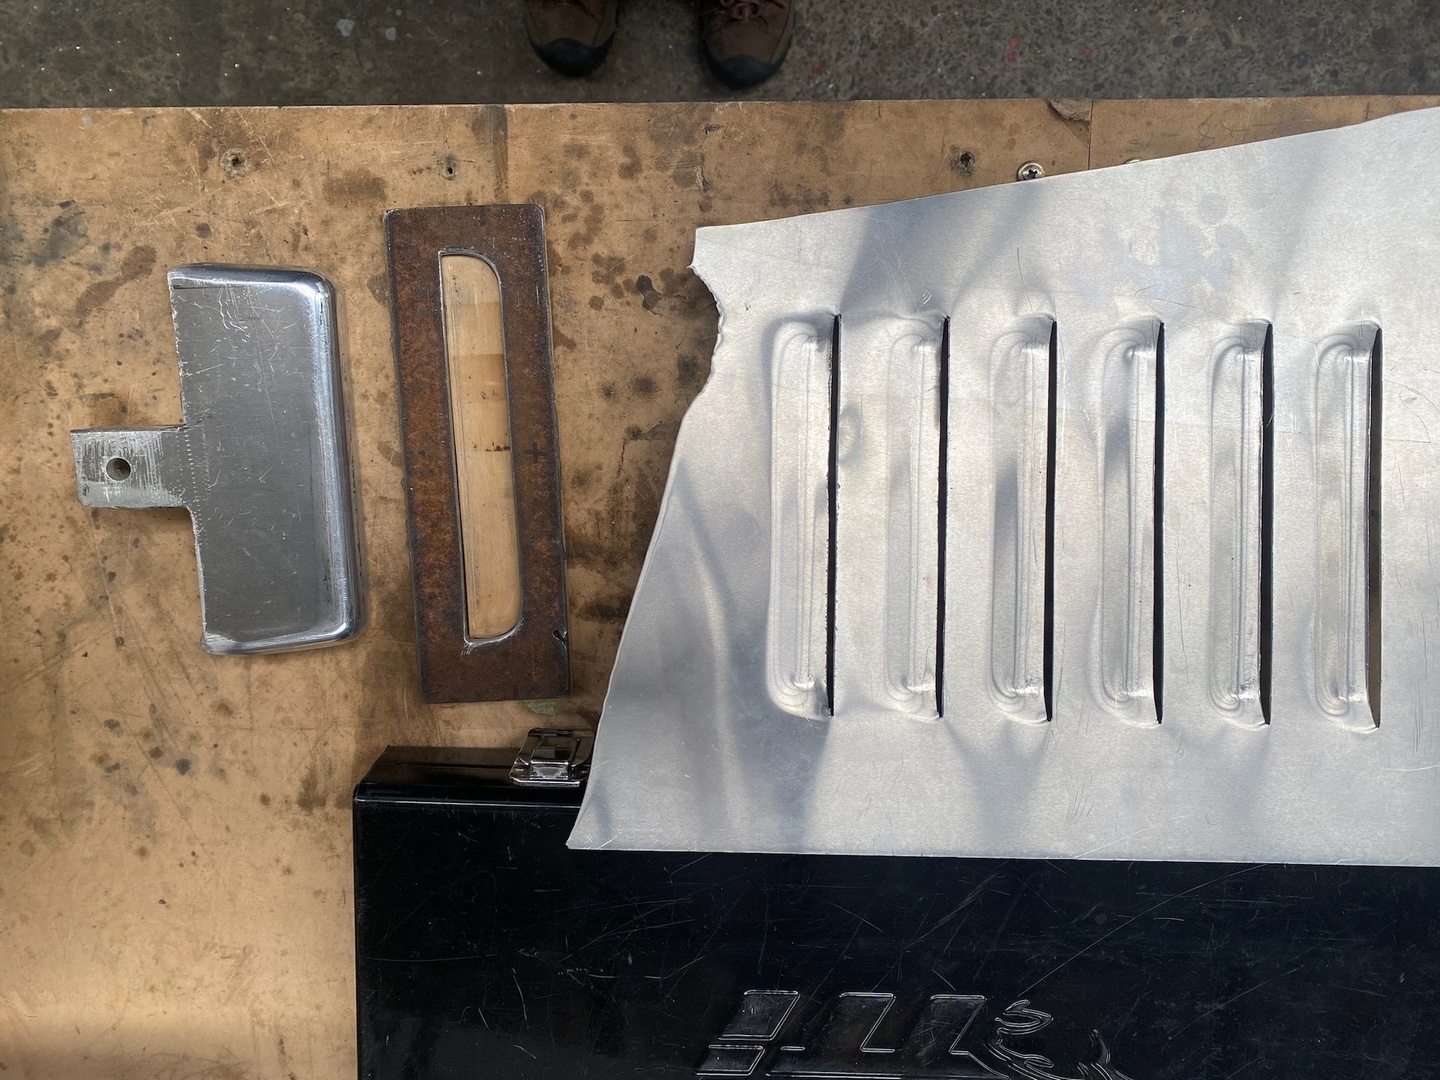
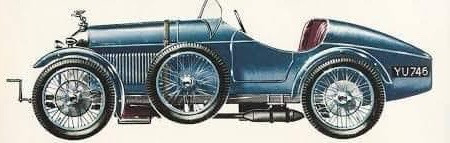
In order to achieve the look of the inspiration car, we needed to work out how to create louvres in the side panels of the bonnet. Some research online suggested a few potential methods. In the end we opted to use a punch and die set in a manual press. The punch is made of aluminium plate which we welded together to get the required thickness. The punch was shaped by hand to give the inside profile of the louvre. The die is a piece of steel with a long 'D' shaped hole in it. The die ha about 3mm of clearance around the punch (when the end of the punch is about 4mm below the top surface of the die). We rounded the top edge of the die somewhat and polished out and surface roughness so it didn't transfer to the aluminium sheet. To press a louvre we needed to cut the sheet for the opening of the louvre with a thin cut off disk in a grinder. Trail and error showed us that the length of the cut was key to getting the louvre to press cleanly. We also discovered that the radius of the ends of the punch needed to be enlarged as a tight radius resulted in the aluminium tearing. A larger radius on the ends stretches the sheet less. We found that it was useful to fix wooden blocks each side of the punch to hold the sheet flat when the punch was at maximum travel. This helps produce a more defined bend at the edges of the louvres. Once we were happy with the set up, we set a fence that we could run the panel along to ensure all the louvres were a consistent distance from the edge and at the same angle. Once we were set up it didn't take long to press the actual panels. 90% of the work is required to make the first louvre.
CycleKarts
27/06/2024
1930s Amilcar
Created by
John King Smith
Build page for a 1930s Amilcar inspired Cyclekart. First time builder so the learning curve is steep.
Chassis finishing
With the bodywork getting close and having decided there aren't any serious changes required to the running gear, it was time to disassemble the kart so the chassis and floor pan can be finished. Steelwork was finished in black enamel and the wooden floor pan got a coat of tinted varnish. After finishing, the kart is looking nice and clean. Ready for body work.
Transportation
Before the bodywork is progressed too far, we thought it would be a good idea to run the kart and test it out. We decided that the best approach would be to fit a frame into the trailer that will locate the kart wheels and also provide tie down points. The frame was built out of angle iron with some fittings built in so the frame can be clamped onto the trailer without the trailer needing to be modified. We are probably using too many tie down straps, but the kart does not move when being trailered.
Bodywork
Finally starting to look at the body of the kart. This is where it's really starting to look like something. Cardboard patterns for the panels were made and fitted to the kart. The sides of the 'bonnet' are separate to the top panel of the bonnet. We need the sides to be removable to allow servicing of the foot pedals.
Radiator
The bodywork around the 'radiator' is probably the most complex panel on the kart. A mock up of the surround was made from MDF so the shape can be tested on the kart. From that a paper template for the alloy sheet was made. This involved a lot of guess work as we don't have a lot of experience with forming aluminium sheet. Nik worked the sheet on the english wheel while comparing the sheet to the shape of the mock up. There is still some fine tuning of the shape to be done but it's really coming along. We found it is useful to anneal the alloy as it work hardens whilst shaping. It's a tricky business as it's very easy to overheat the aluminium.
Radiator badge
Nik has created a replica Amilcar badge for the radiator by tracing the badge from a photo, then scaling it to a suitable size for the kart and printing out a copy. Glued the print out to a piece of alloy sheet and cut it out using a fret saw. Some cleaning up with jewellers files and it's done.
Loading...
No more posts.