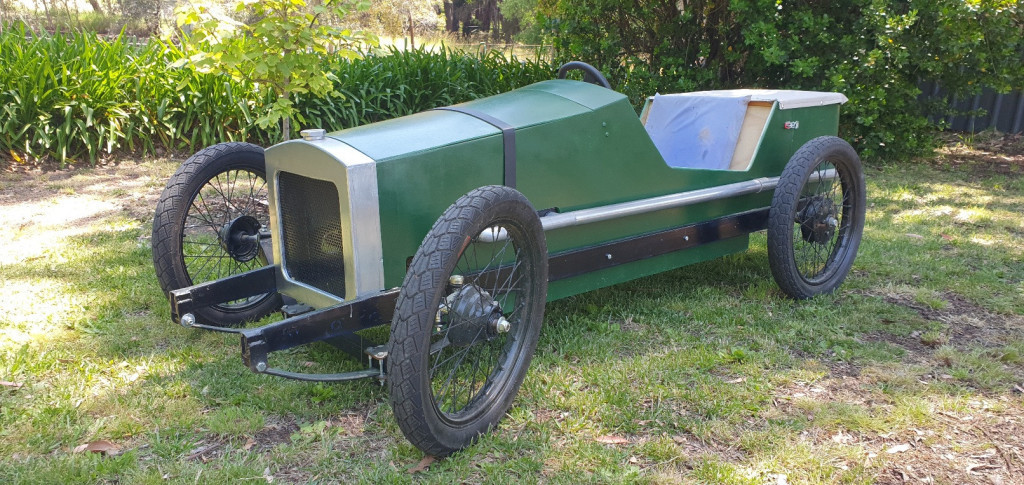
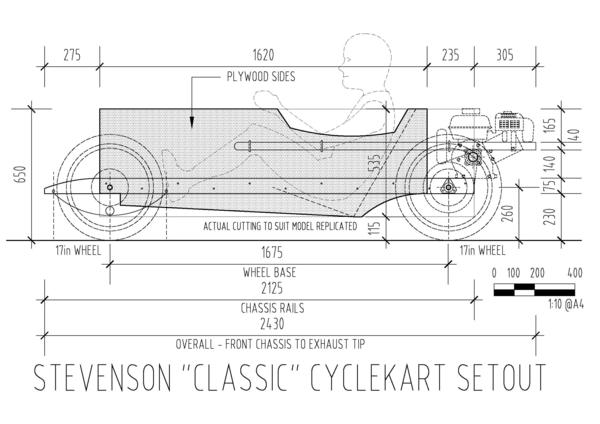
The bodywork in its most simple form is a simple plywood box. This is most easily seen in the traditional 'Stevensons' design as shown below.

The box is constructed to fit in between the two chassis rails and is most often bolted in place using coach bolts bolted through the chassis rails. The floor of the box sits below the chassis rails to lower the centre of gravity, which greatly helps handling.
The side profile is cut to shape to resemble the inspiration car and can be scaled from an overlay of the tribute car. In the classic Stevenson layout diagram you will note that the shaded part represents the plywood sides...

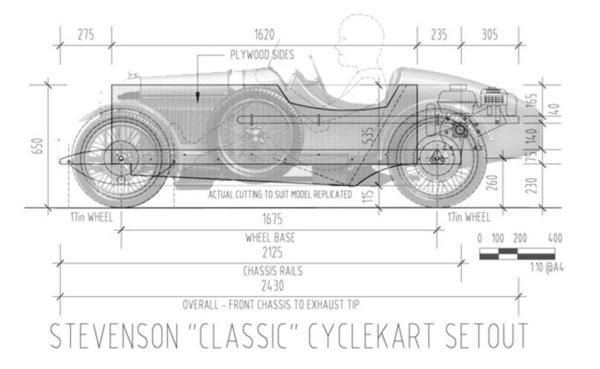
But in the following drawing, showing an Amilcar overlaid on top of the same drawing, you will note that the profile of the car is somewhat shorter and taller, requiring differently shaped side panels.

There is also another caveat to be careful of here. If you look at the Amilcar, what you might notice is that when you scale the full sized car to fit Cyclekart proportions (an approximate 2:1 scale), the size of the passenger compartment also shrinks in size. This would make the car very difficult to get into and out of. So you may need to apply a little creative license and enlarge the passenger compartment to a suitable size. This has the effect of making the finished car more like a caricature of the inspiration car rather than a perfect scaled model.
Don't forget to take into consideration the front and rear profiles of your inspiration car. Amilcars for example are relatively tall and narrow compared to many other cars of the era.
Scaling the design from a small piece of paper to a full sized plywood panel can be achieved by dividing the paper into squares and then drawing larger squares at the necessary scale on the plywood. If you have access to a projector you can also project the image directly onto the plywood and draw the outline that way.
Many people use C.A.D. to design their Cyclekarts, (Cardboard Aided Design). Good old fashioned cardboard can be used to make patterns or create a temporary mock up before transferring the design into the plywood. This can really help you get a sense of the proportions and check if the scaling is correct. It is much easier to tweak cardboard if things don't look exactly right.
Alternate materials
Depending on your skill level (or sense of adventure) you might also want to consider using alternate materials to plywood, such as metal or maybe a combination of both. For example plywood makes for a fairly easy and sturdy base and floor pan, but you might want something a little less square looking for the upper part of the bodywork.
The front upper bonnet section can also fairly easily be made from metal formed over hoops that fixed are to the chassis to give a more rounded appearance.
Front grilles can be made from all manner of things, from ironing boards to kitchen sinks.
Depending on the inspiration car, the rear section of the bodywork, if the design has bodywork there, can be made to be removable to be able to access the engine for starting and refuelling. This can be the most challenging part of the bodywork to build, especially if the inspiration car has a boat-tailed body shape. But this can also be an opportunity to get creative with the construction techniques.
Thin plywood can relatively easily be formed over a wooden frame, or laminated into a free standing shape by glueing several thinner sheets together over a former. Fibreglass is another material that can be used to make almost limitless shapes from once a mold or form has been made. You can even use resin impregnated canvas stretched over a frame. All have been used with success in the past and such techniques are well documented on the internet.
Of course if you are really up to the challenge you can form the body in metal using traditional metal shaping techniques. It is possible to shape any panel with just simple hand tools. This is how many cars were originally built.
