
- 279 users


Pinned Items
Recent Activities
-
Pete_R commented on this post about 1 month agoHi , Peter here they you for my membership , I am from Bendigo VicPost is under moderationStream item published successfully. Item will now be visible on your stream.
-
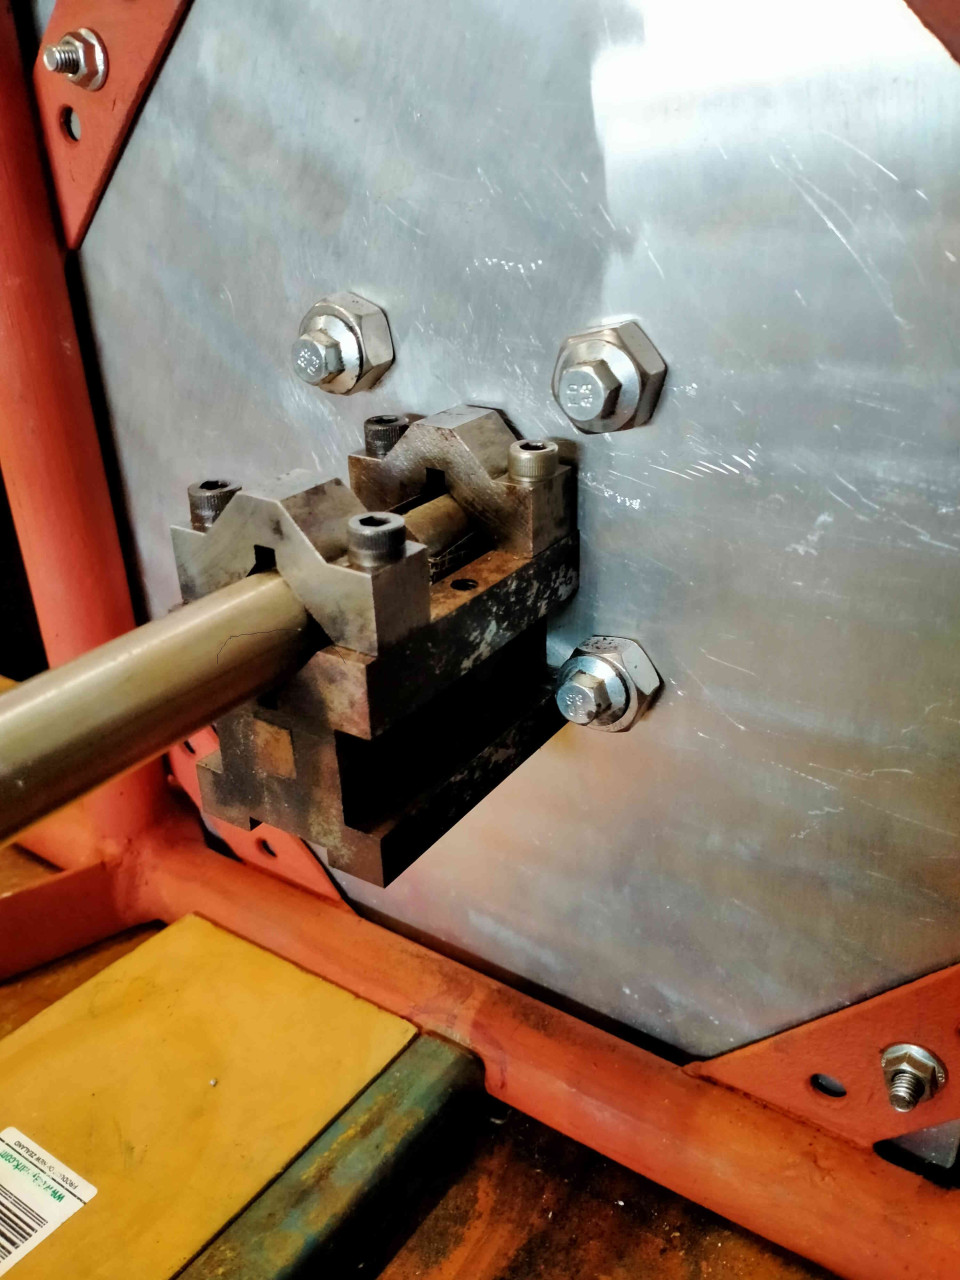
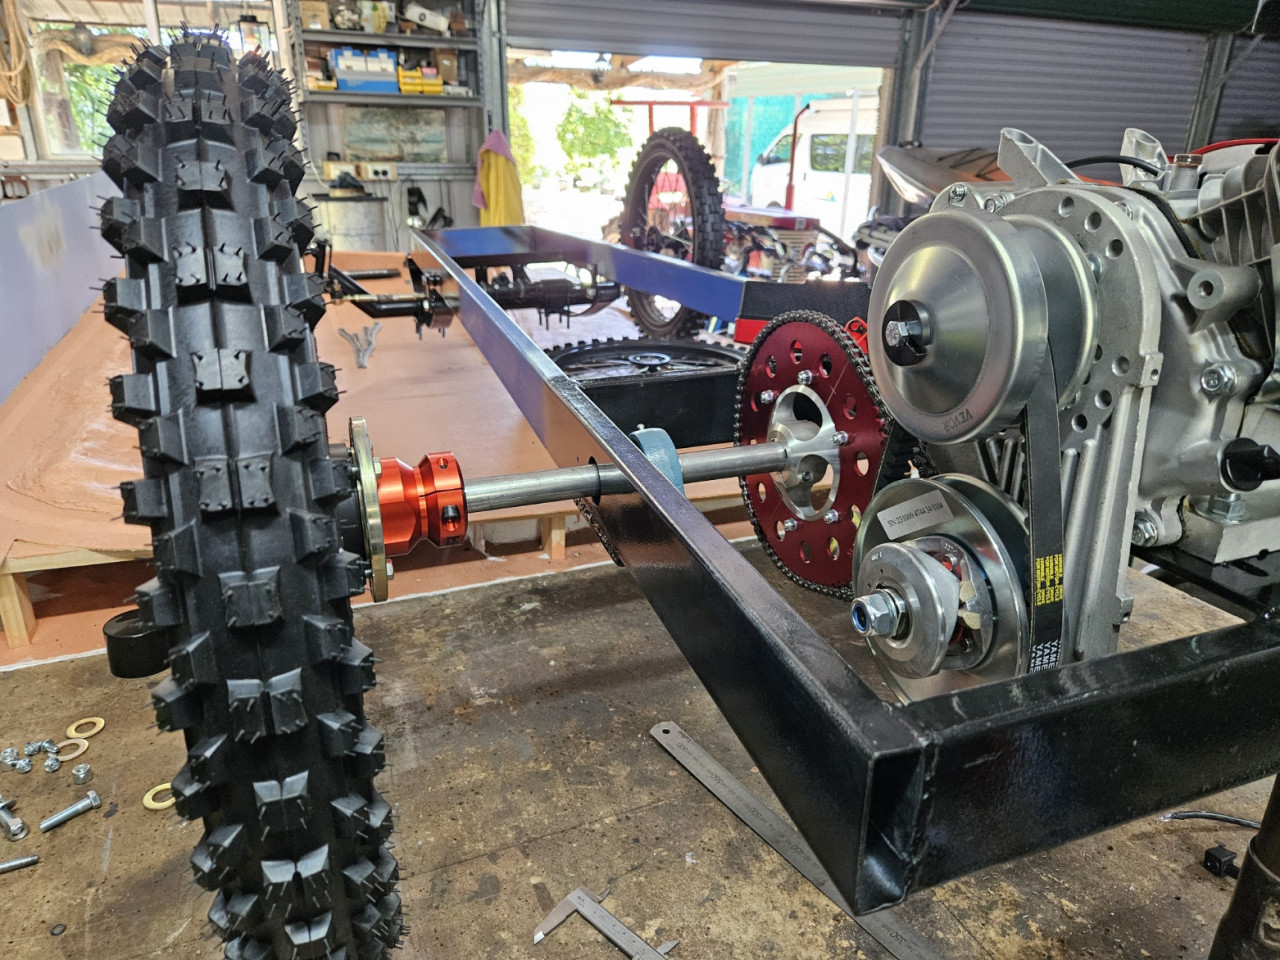
Pursang's "Vintage Morgan" Inspired 3 Wheeler. reacted to this post about 1 month agoFound a new use for the shaft fixture used when cutting the key ways.
Shaft is aligned squarely and straight to the engine mounting plate and output shaft.
 Post is under moderationStream item published successfully. Item will now be visible on your stream.
 -
Stream item published successfully. Item will now be visible on your stream.
-
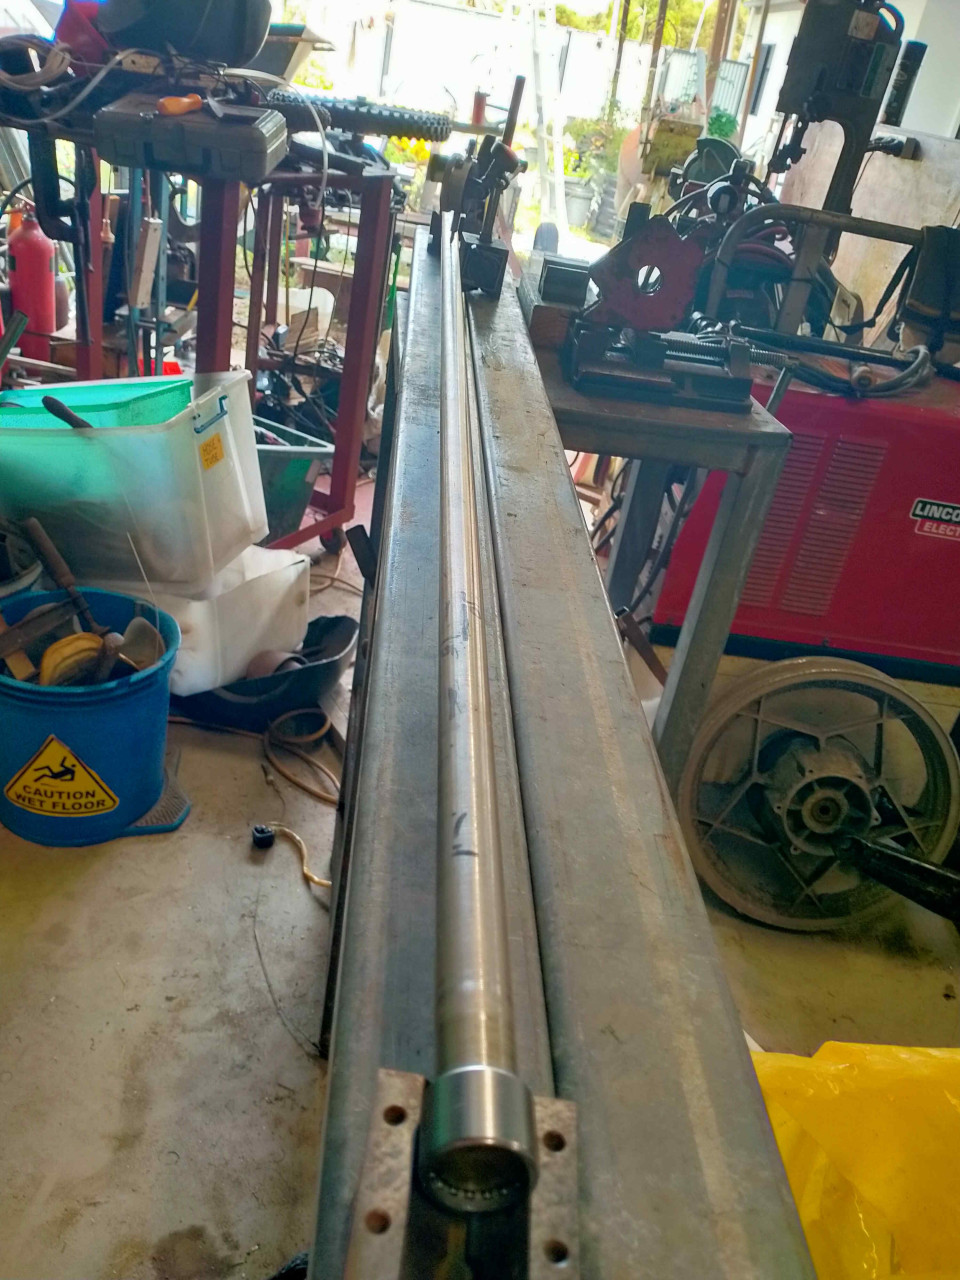
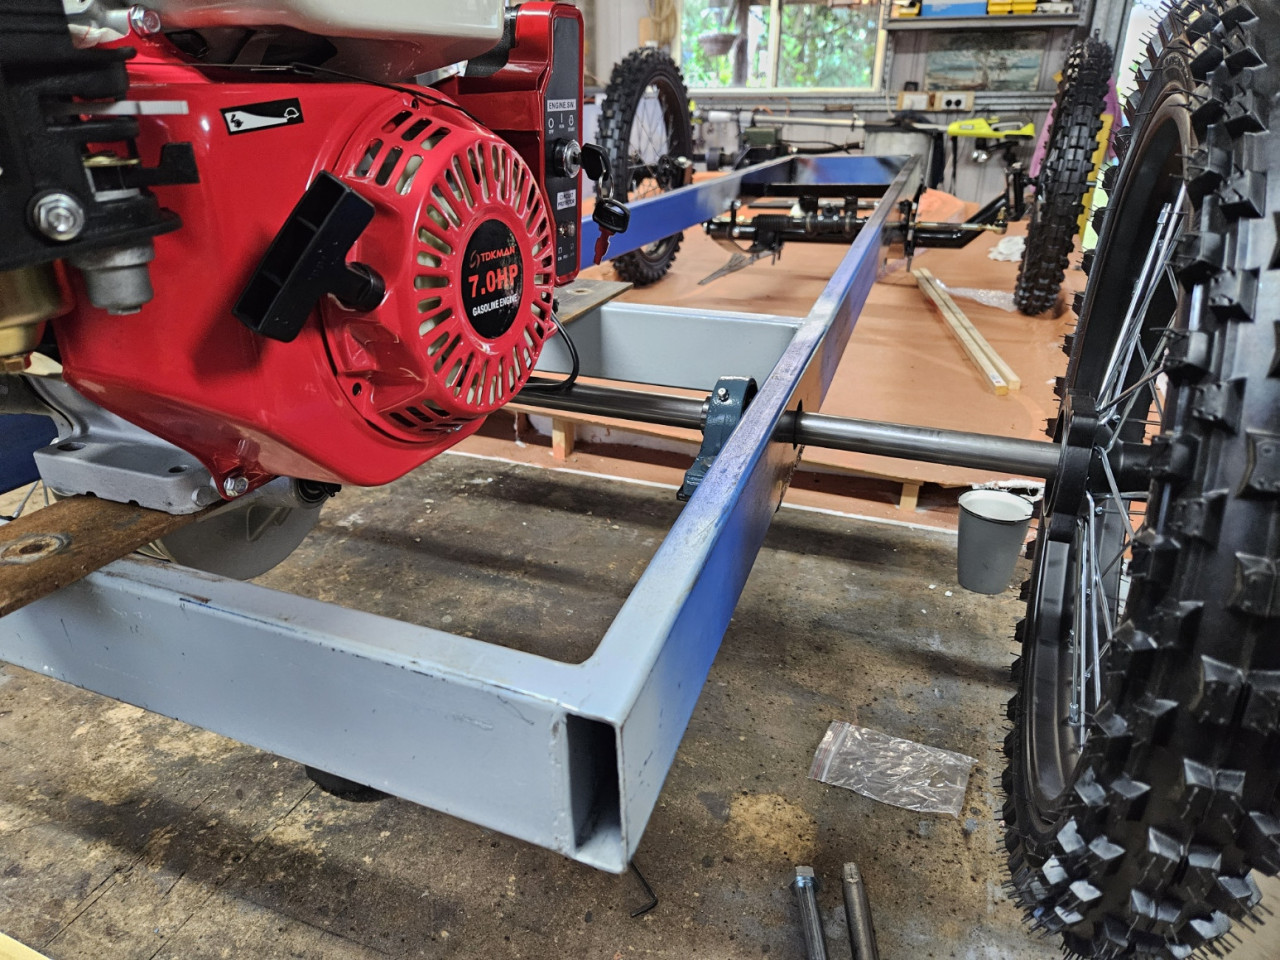
Pursang's "Vintage Morgan" Inspired 3 Wheeler. reacted to this post about 1 month agoAfter cutting the key ways, it turned out that the shaft (bought new) was actually spaghetti.
Visibly plus or minus 1mm at several points along it's 1300mm length.
I set it up in needle roller bearings and V-blocks, then measured and massaged it to nearly straight.
Biggest variation is now 0.1mm (around 0.004".), hopefully this will be...After cutting the key ways, it turned out that the shaft (bought new) was actually spaghetti.More
Visibly plus or minus 1mm at several points along it's 1300mm length.
I set it up in needle roller bearings and V-blocks, then measured and massaged it to nearly straight.
Biggest variation is now 0.1mm (around 0.004".), hopefully this will be sufficient.
 Post is under moderationStream item published successfully. Item will now be visible on your stream.
 -
Stream item published successfully. Item will now be visible on your stream.
-
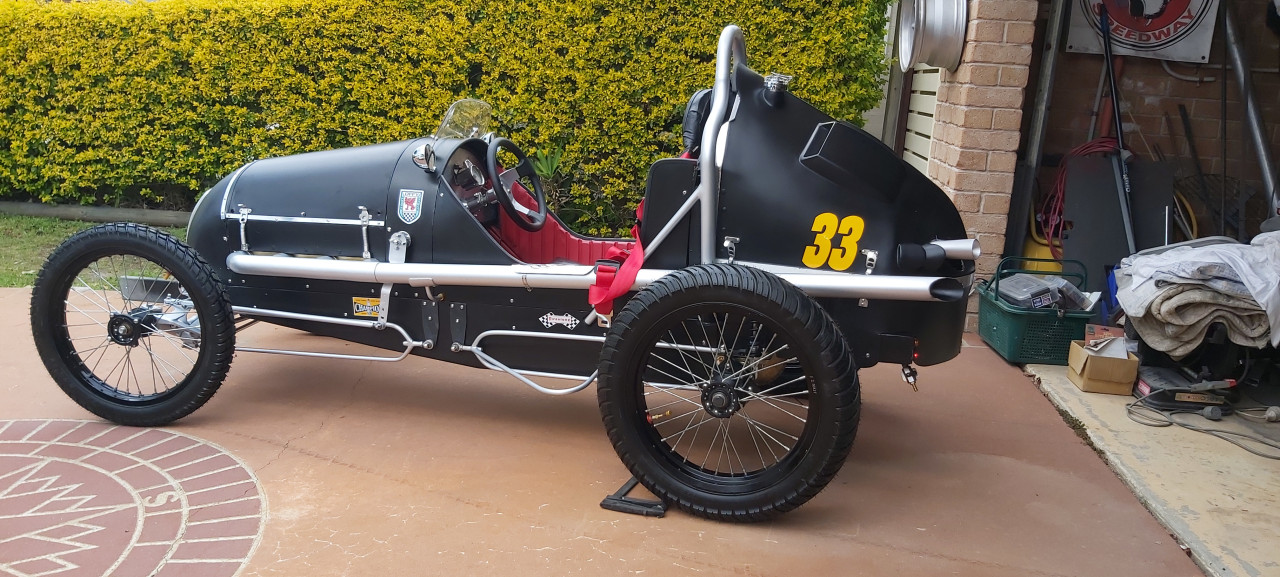
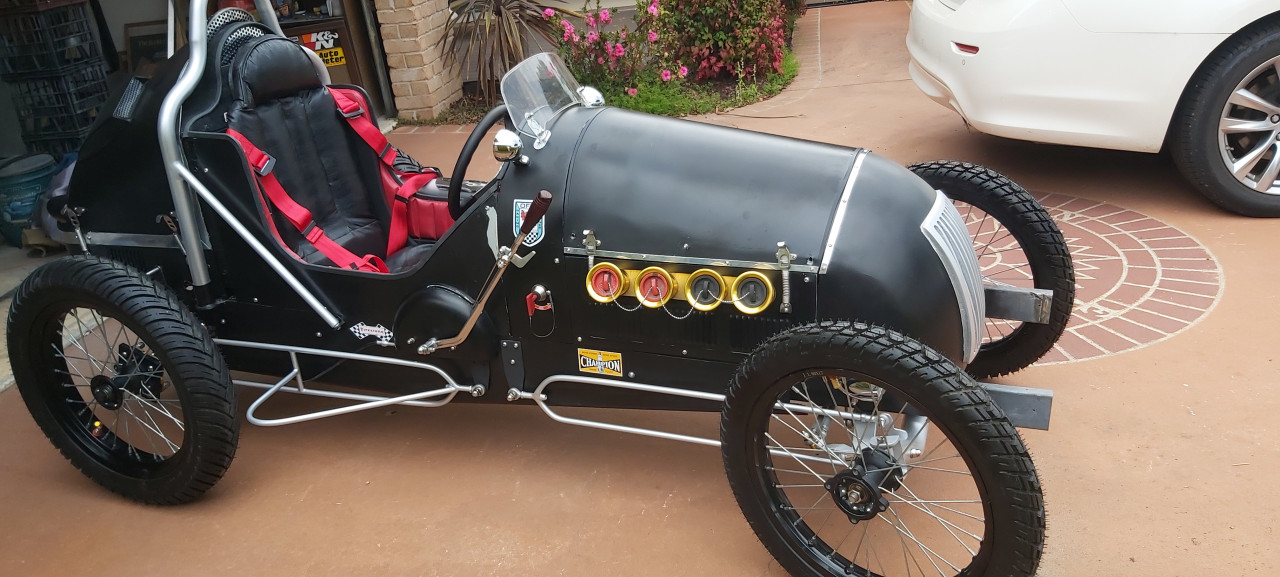
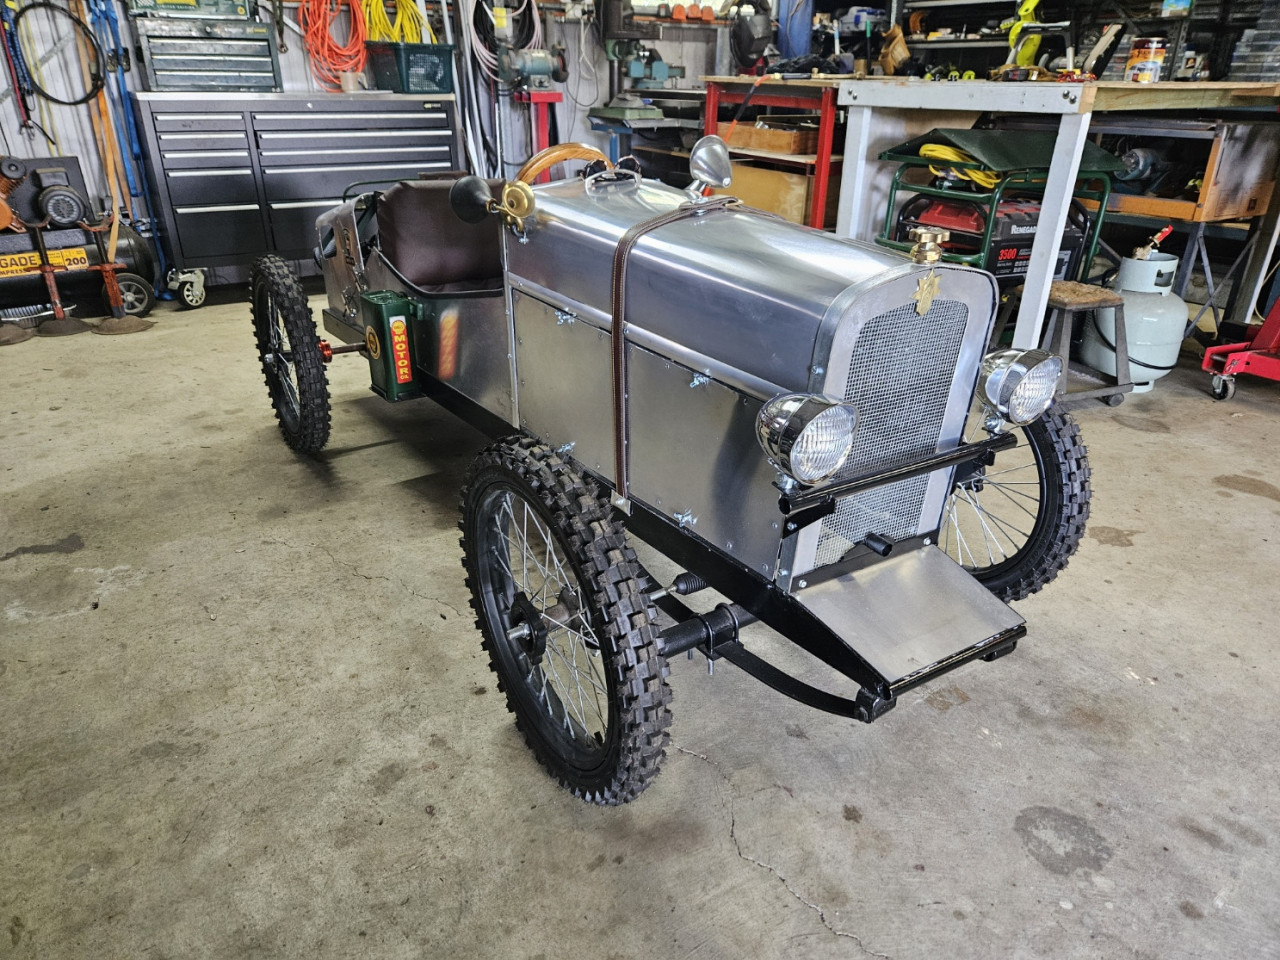
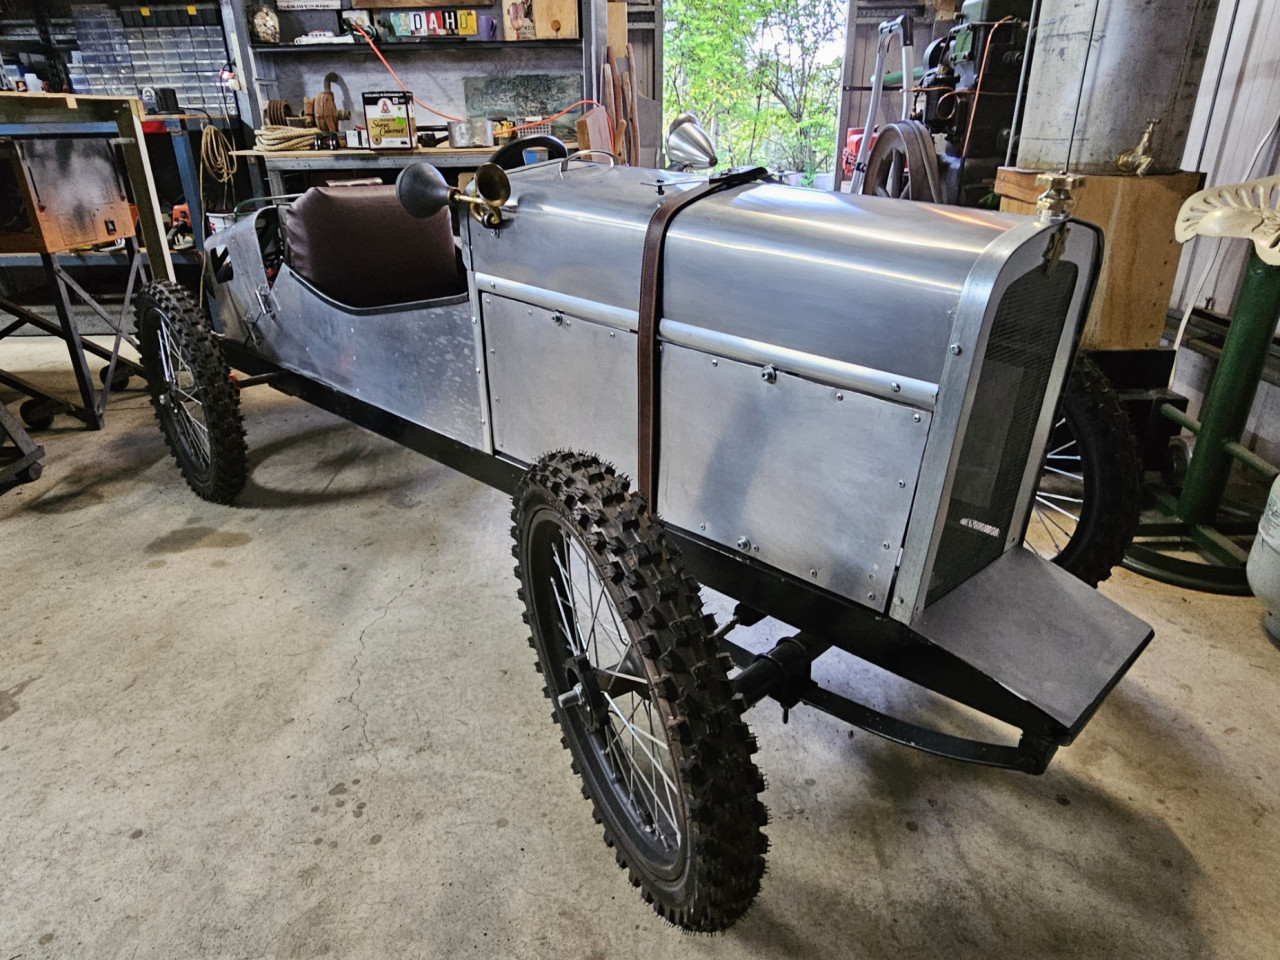
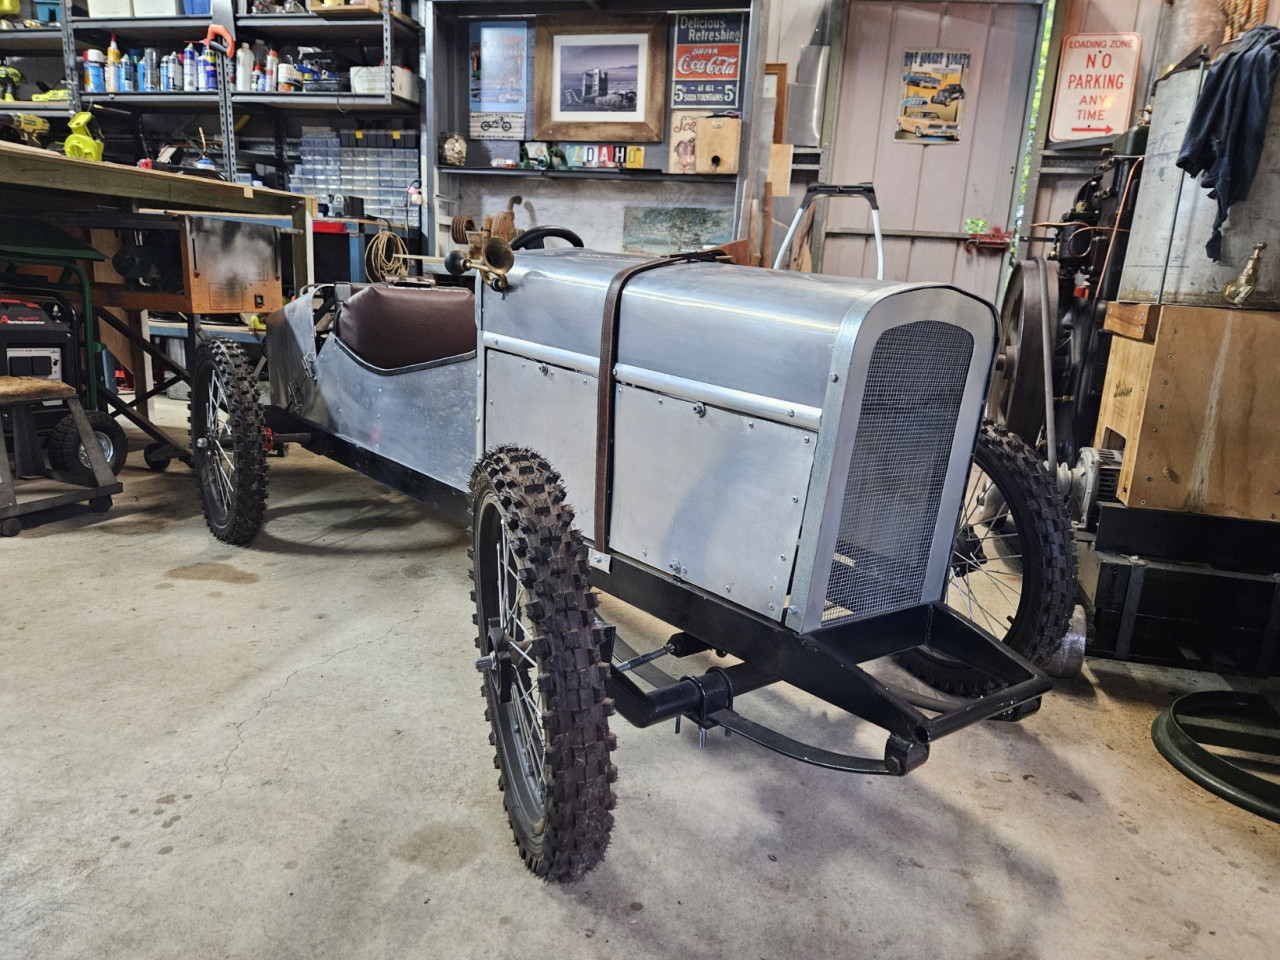
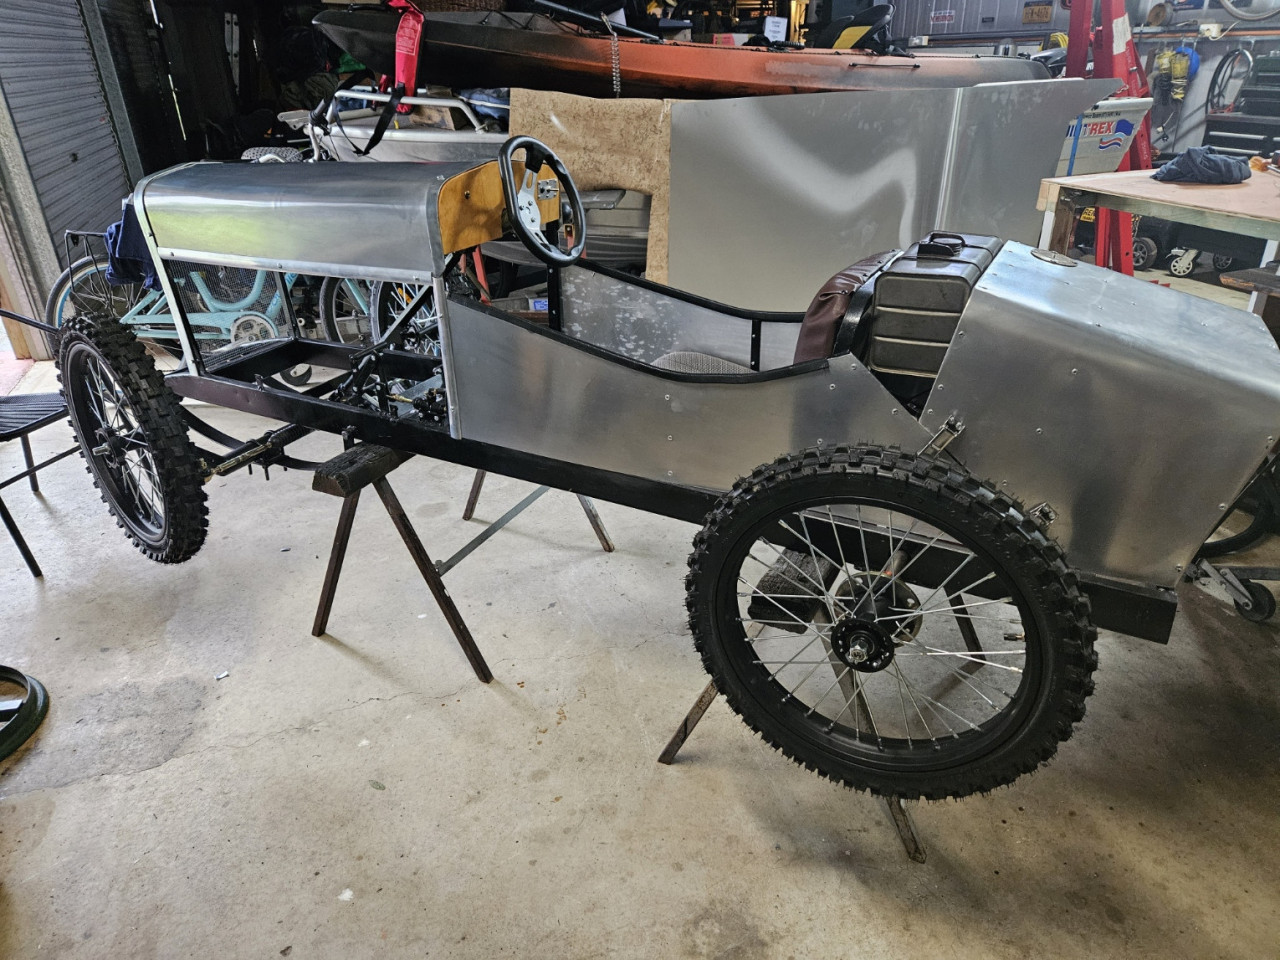
kjacml@yahoo.com.au reacted to this post about 1 month agoMore photos of the buildPost is under moderationStream item published successfully. Item will now be visible on your stream.
-
Pete_R reacted to this post about 1 month agoSome historical photos of the build...Post is under moderationStream item published successfully. Item will now be visible on your stream.
-
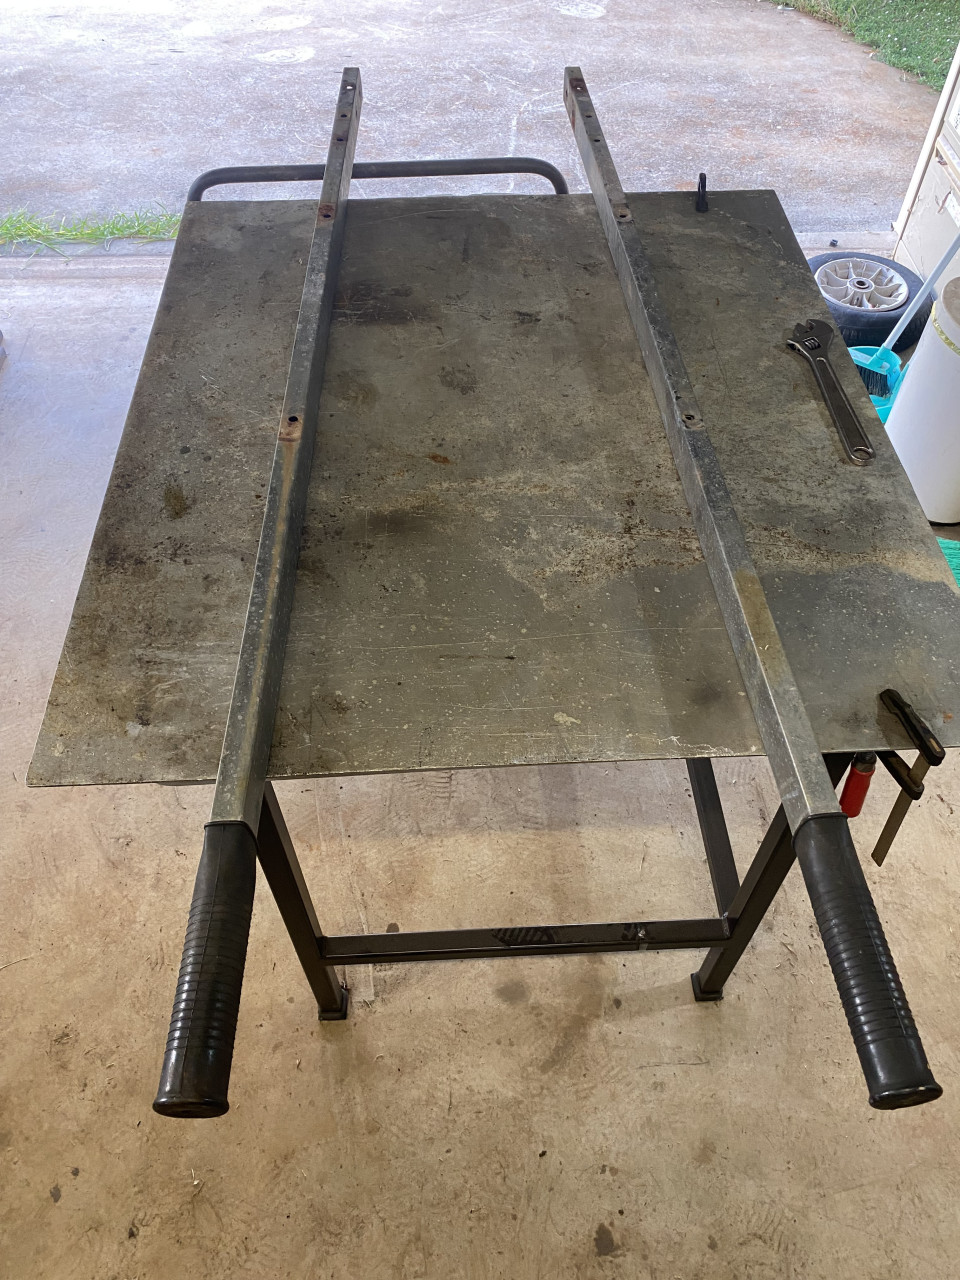
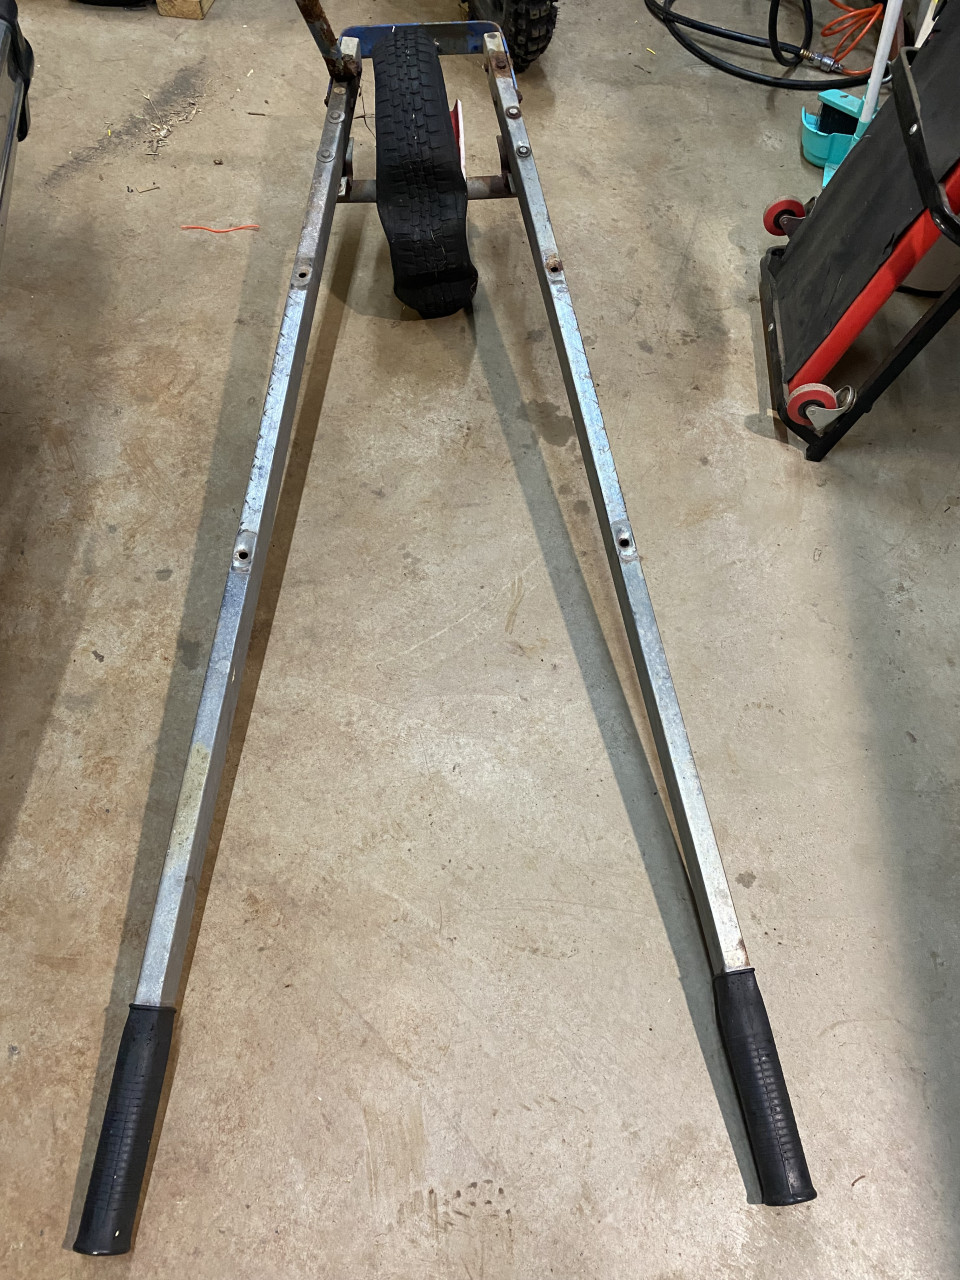
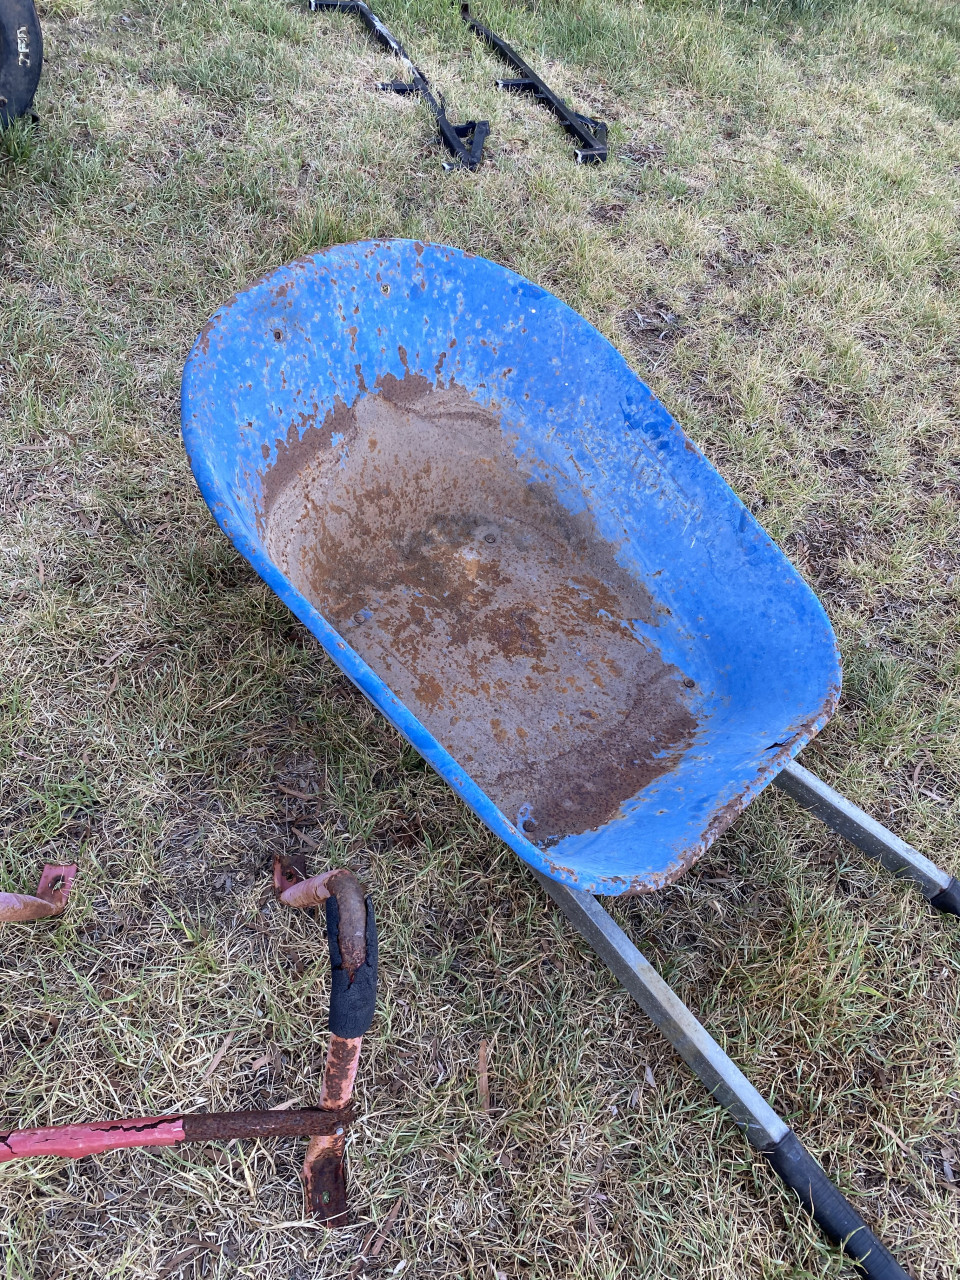
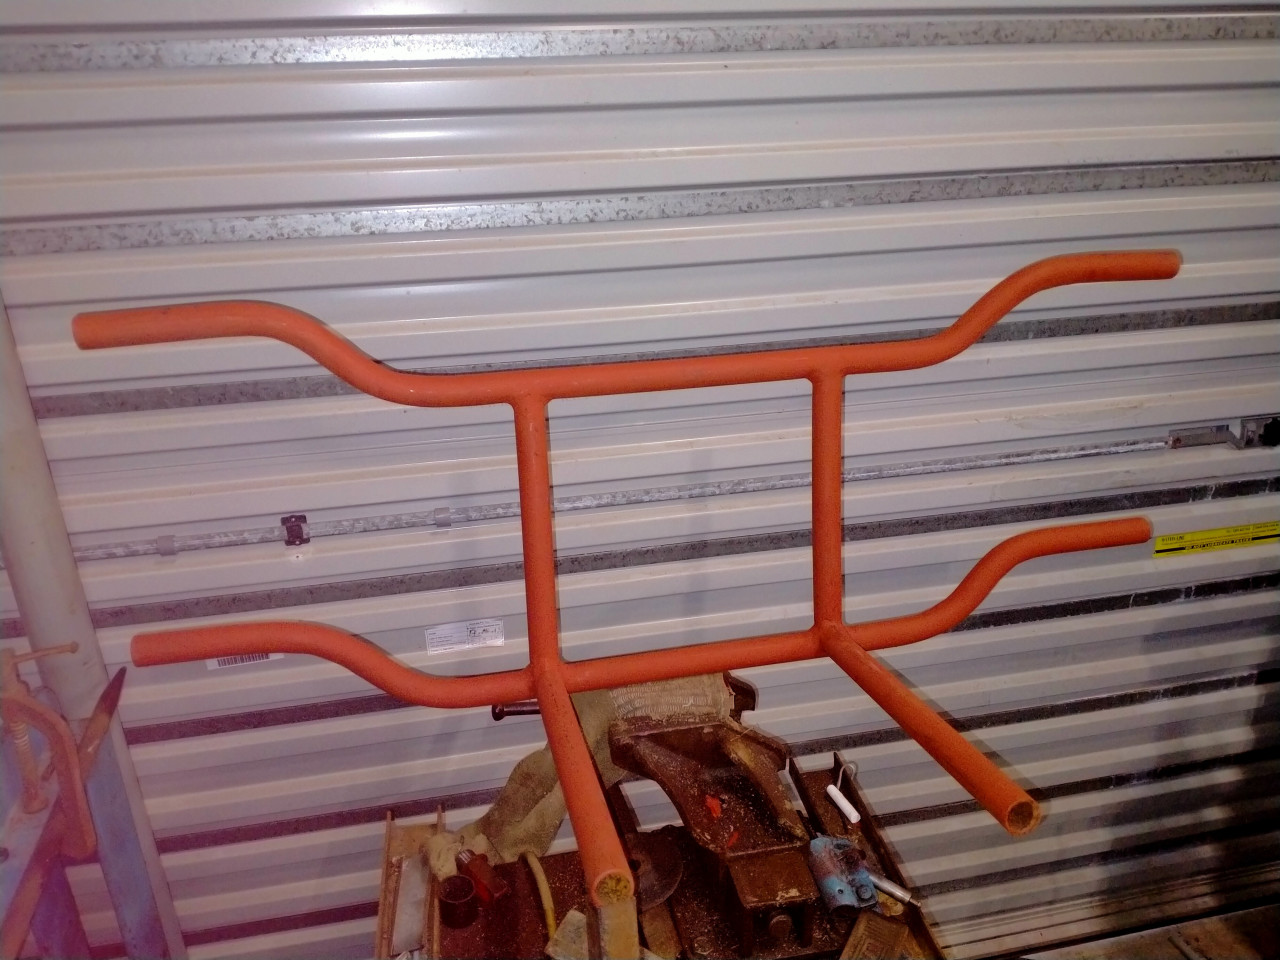
kjacml@yahoo.com.au reacted to this post about 1 month agoStep one. Wheelbarrow handles as the chassis side rails.
 Comments (2)
-
 Can't wait to see what you come up with
 -
 Love it
Post is under moderationStream item published successfully. Item will now be visible on your stream. -
-
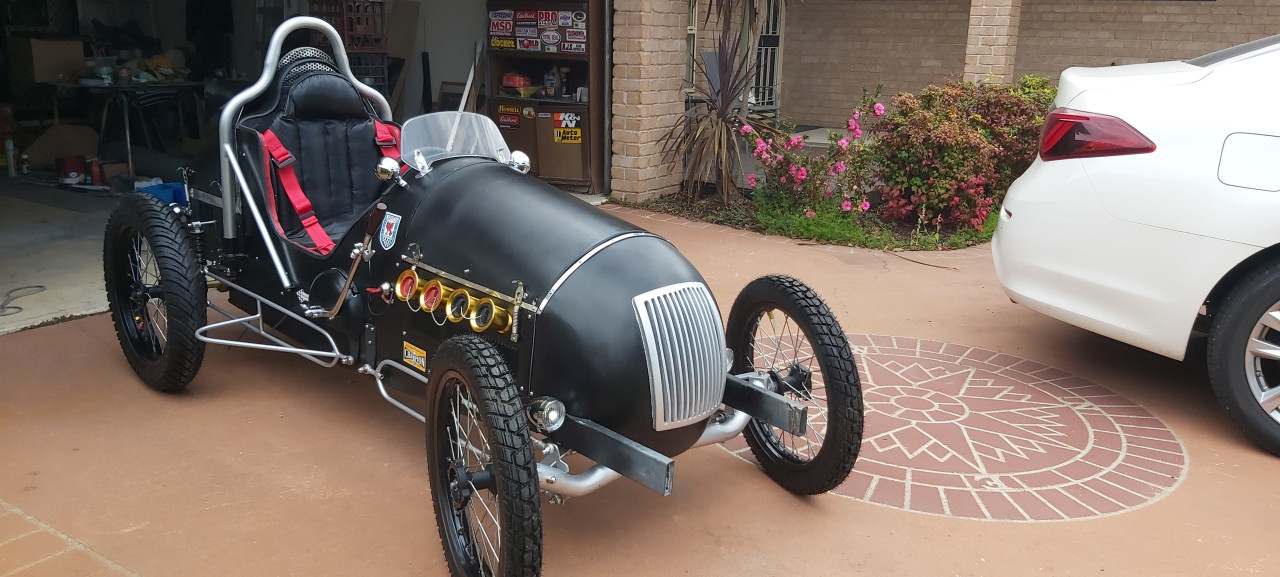
phil33 commented on this post about 2 months agoHey Pete, karts looking good.
What did you use for exhaust manifold I like the flanges.
Are bonnet straps large jean belts?
Did you fab the knock offs?
Cheers 🍻 Phil
Comments (5)-
Hey mate, thanks!
The exhaust manifold I 3D Printed from a file I found online. If you want one or at least the flanges I can help you out with More ... -
 Wheel knock off hubs
 -
And thanks for your offer 👍
-
oh cool, I follow now! I 3D printed those too. Then painted in hifill primer and liquid chrome paint. They came up pretty well. Offer stands for More ...
-
Thanks Pete

Post is under moderationStream item published successfully. Item will now be visible on your stream. -
-
Mail Delivery Subsystem <mailer-daemon@googlemail.com>
8:09 PM (0 minutes ago)
to me
Error Icon
Address not found
Your message wasn't delivered to noreply@cyclekarts.org.au because the address couldn't be found, or is unable to receive mail.
The response from the remote server was:
550 5.1.1 User does not exist -
---------- Forwarded...Mail Delivery Subsystem <mailer-daemon@googlemail.com>More
8:09 PM (0 minutes ago)
to me
Error Icon
Address not found
Your message wasn't delivered to noreply@cyclekarts.org.au because the address couldn't be found, or is unable to receive mail.
The response from the remote server was:
550 5.1.1 User does not exist -
---------- Forwarded message ----------
From: MIC Hobo <cafe42mmm@gmail.com>
To: noreply@cyclekarts.org.au
Cc:
Bcc:
Date: Wed, 22 Oct 2025 20:08:53 +1100
Subject: Re: phil33 posted on your timeline
Hi Phil not much good on computa and thank you for the welcome ,i have 2 other people wanting to start building cyclekarts and start up a club .we have off road track which is used twice a year for that event ,a tractor pull, also someone starting lawn mower racing rainbow is on the move i am currently putting together a very simple kart so everybody can join in and affordable .
cheers mickPost is under moderationStream item published successfully. Item will now be visible on your stream. -
Stream item published successfully. Item will now be visible on your stream.
-
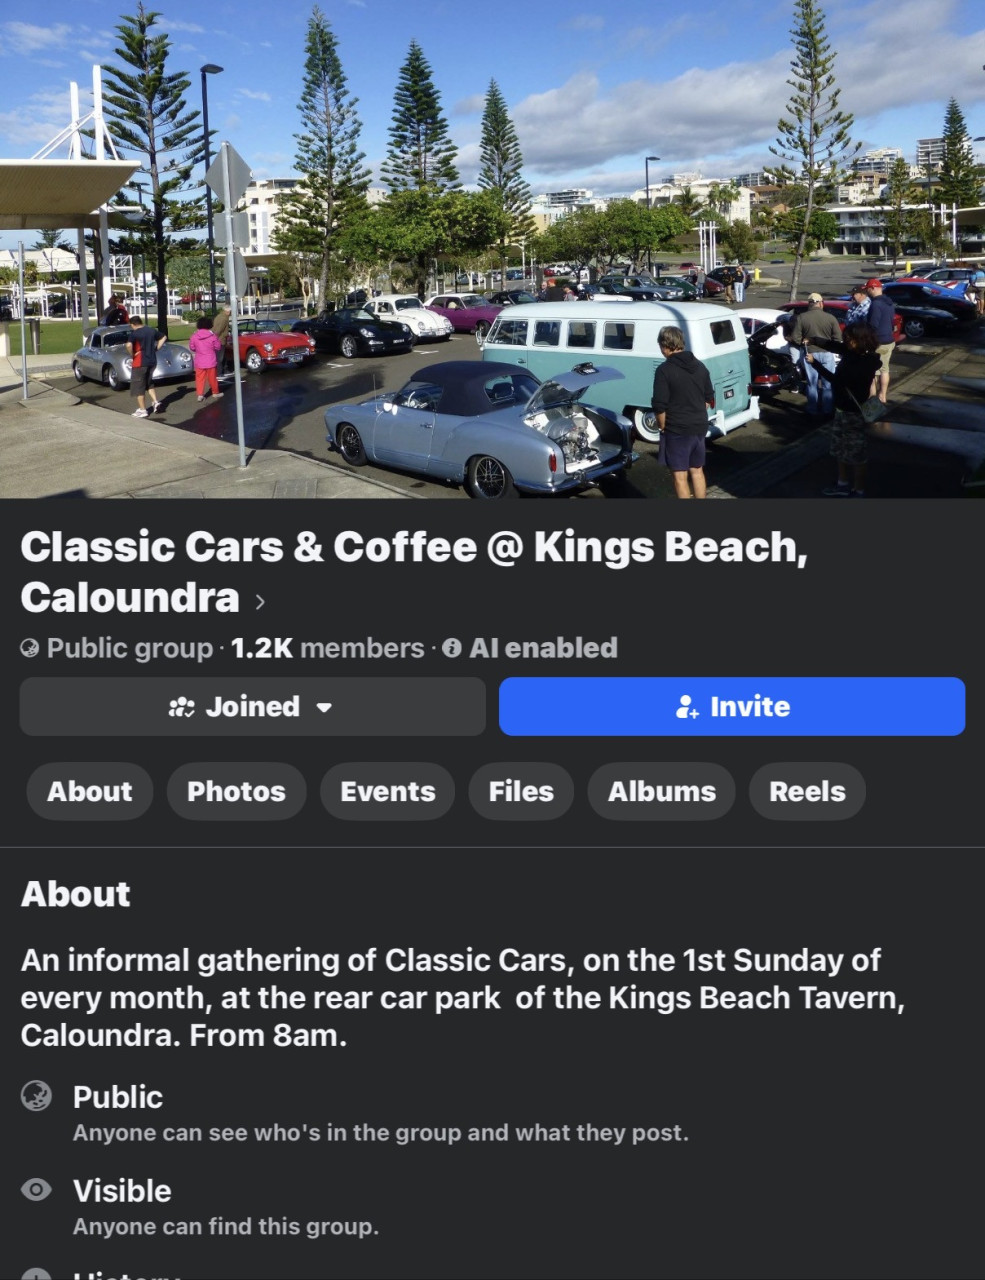
Planning on taking a couple of karts to this on November 2nd.
 Post is under moderationStream item published successfully. Item will now be visible on your stream.
 -
Stream item published successfully. Item will now be visible on your stream.
-
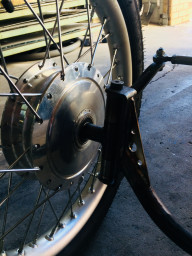
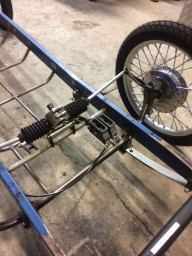
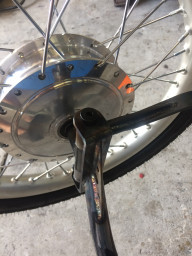
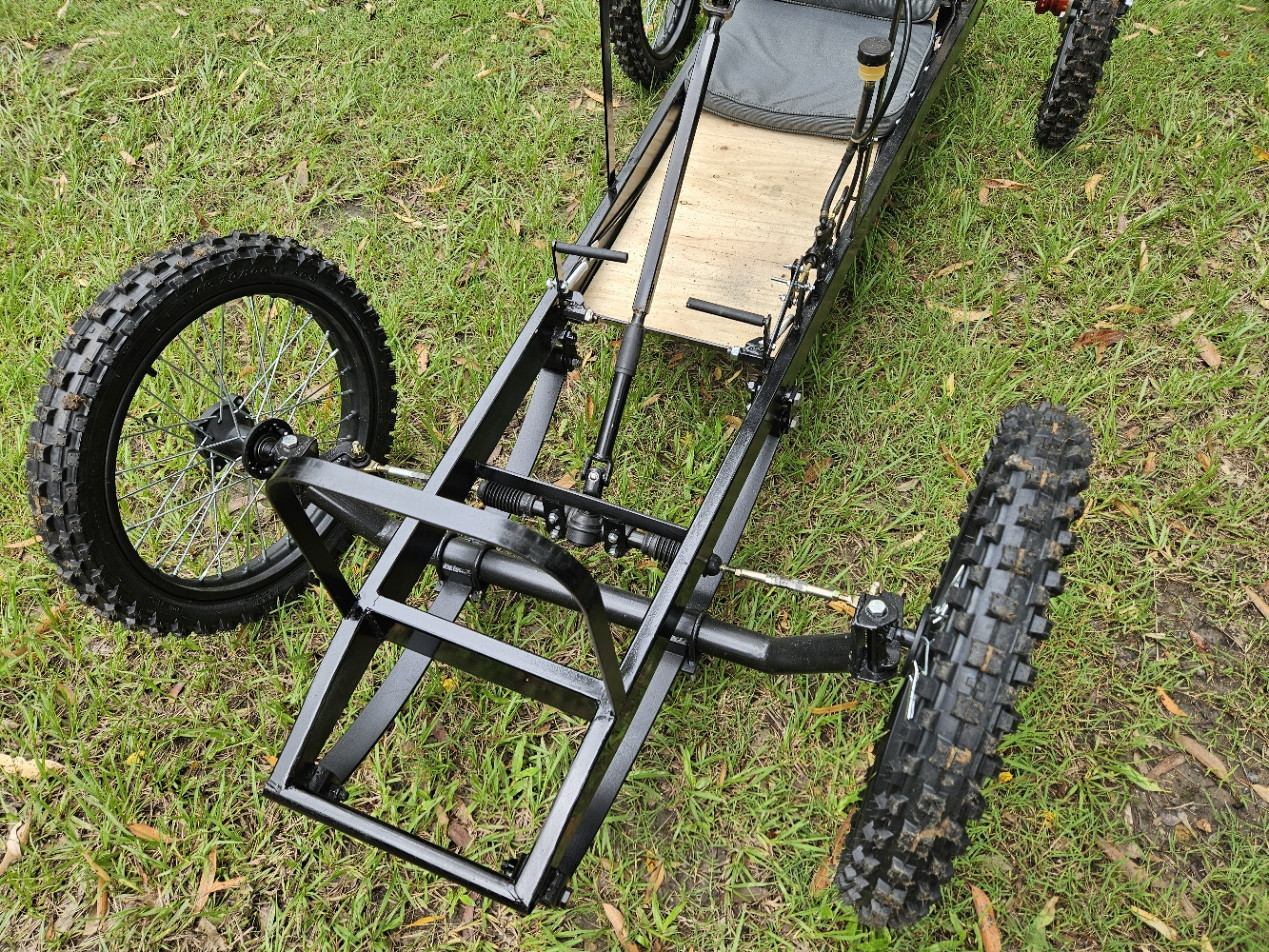
kjacml@yahoo.com.au reacted to this post about 2 months agoSome updates over the last few days. Removed the lugs from the inside of the front wheels so that the wheel fits with the lugs ion the inside and the lugs don't interfere with the steering arm. Fitted grease nipples to the steering king pins and removed some of the vertical play with shims. Removed the rack & pinion to replace it with a new...Some updates over the last few days. Removed the lugs from the inside of the front wheels so that the wheel fits with the lugs ion the inside and the lugs don't interfere with the steering arm. Fitted grease nipples to the steering king pins and removed some of the vertical play with shims. Removed the rack & pinion to replace it with a new better quality rack (on order). Made a new seat bucket.MorePost is under moderationStream item published successfully. Item will now be visible on your stream.
-
Pete_R reacted to this post about 2 months agoCut some key-ways in a shaft.
5mm slots in a 3/4" 304 SS. round bar.
First time I've done one like this, rather pleased with how they turned out.
The mounting fixture might have been a tech school project, I found it at a garage sale.
It's bolted down to the cross slide vice on my little lathe drill mill.
Budget Chinese slot drill in the drill...Cut some key-ways in a shaft.More
5mm slots in a 3/4" 304 SS. round bar.
First time I've done one like this, rather pleased with how they turned out.
The mounting fixture might have been a tech school project, I found it at a garage sale.
It's bolted down to the cross slide vice on my little lathe drill mill.
Budget Chinese slot drill in the drill chuck, 'cos my collet chuck has imperial sizes (1/4" collets, not 6mm).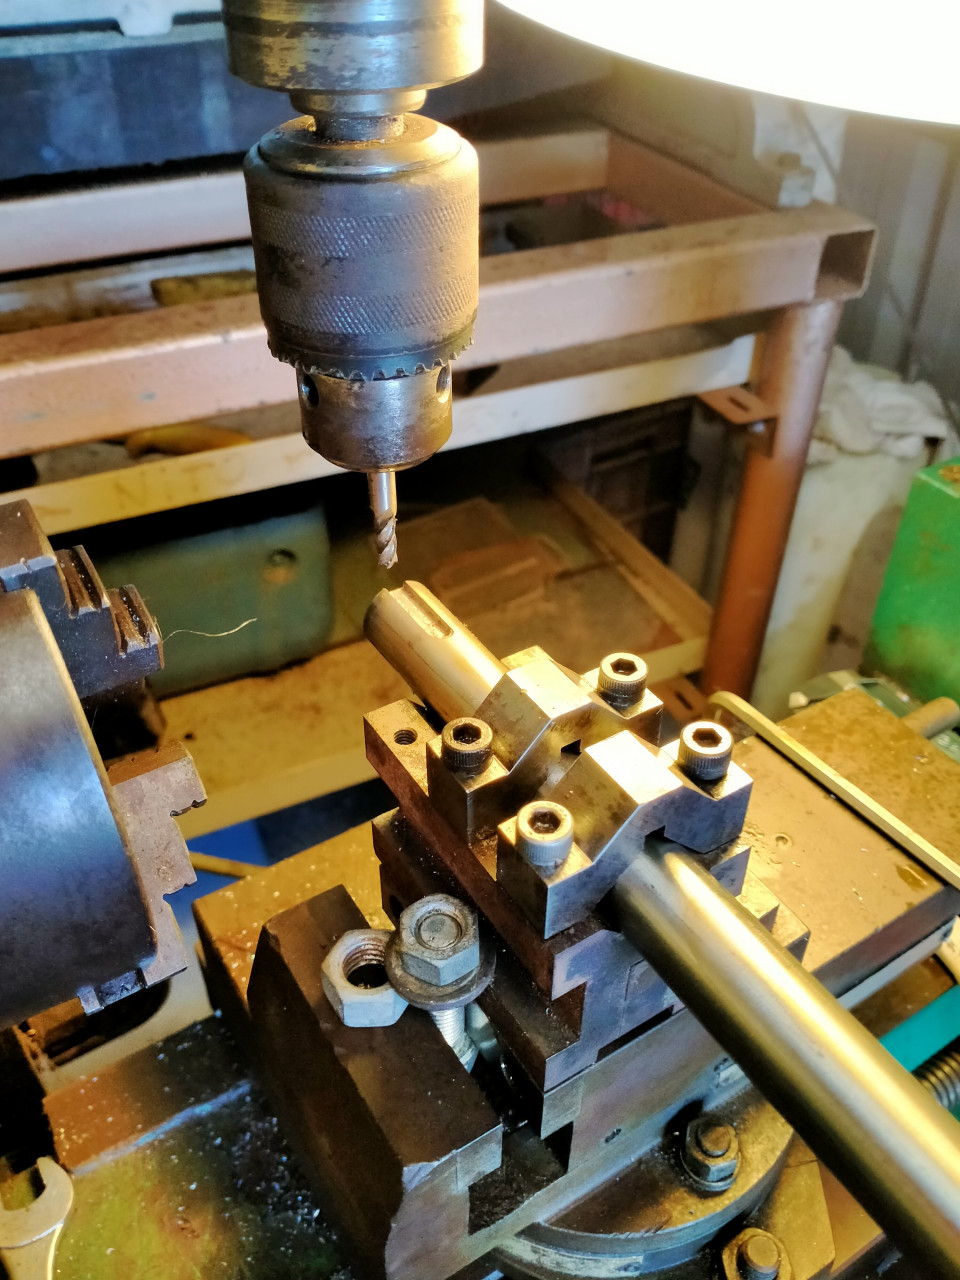 Post is under moderationStream item published successfully. Item will now be visible on your stream.
 -
Mick reacted to this post about 2 months agoI saw a new member (Chris Gray) joined the WA Cyclekart group recently. I'm located in Willetton if Chris wants to try and catch up sometime to discuss cyclekarts.Post is under moderationStream item published successfully. Item will now be visible on your stream.
-
Kingshill reacted to this post about 2 months agoI fully retired in April 2025, and was searching for a project when I came across ‘Cycle Karts’. Love the idea. Raced enduro motorcycles in my youth and rally cars in middle adulthood.
My thoughts: wanted a period correct build with front and rear suspension, and wanted roll-over protection without an ugly roll-hoop. Also wanted the challenge...I fully retired in April 2025, and was searching for a project when I came across ‘Cycle Karts’. Love the idea. Raced enduro motorcycles in my youth and rally cars in middle adulthood.More
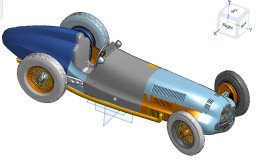
My thoughts: wanted a period correct build with front and rear suspension, and wanted roll-over protection without an ugly roll-hoop. Also wanted the challenge of front engine, rear wheel drive, and low seating height. I’ve built stuff before - usually with a basic drawing and then straight into manufacture. This time I decided I’d learn to use CAD and do a lot of planning before getting out my MIG and grinder. Onshape is a free modern CAD cloud-based tool and I’m slowly learning to use it. I have verified my basic packaging and have begun accumulating sources for materials and have purchased some of the parts.
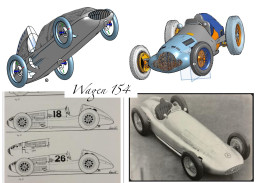
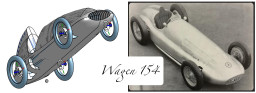
I initially hoped to purchase a CAD file of the W154 body and re-scale it, but all I could source were STL files which I couldn’t scale - so I had to start from scratch. It’s certainly interesting learning new skills.
My first purchase was a brand new Honda GX200 - sitting unstated, with no oil or petrol to date! I think I bought it as a sign of commitment. Basic body shape is pictured on my profile page - the crest behind the cockpit is too high and I’ll have to redo it. That in itself won’t be easy, as a lot of the shaping was done in my very early Onshape adventure, and I don’t think I can undo it. Hopefully it will be easier the second time around.
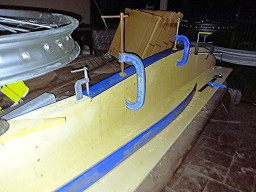
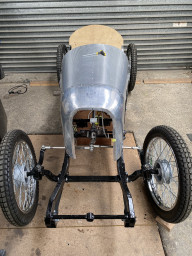
My plan for the next step is to start a mockup of the basic frame and chassis in wood (I don’t want to keep cutting/welding/grinding metal repeatedly) and see how real-world packaging works.
Rear end: De Dion as per W154. Differential fixed to oval section longitudinal chassis rails (cattle yard rails). Half shafts with CV joints. Lateral fixed via mid section of De Dion tube sliding up and down in a housing fixed to the chassis at the rear of the differential (as per W154). Rear springs: longitudinal torsion bars (a Porsche patent apparently) as per W154. Sourcing plan is to obtain some VW Beetle (pre-1964?) front torsion leaves and stack one or two together.
Front end: Independent double wishbones and coils as per W154.
Transmission: Comet 40 TAV, gearbox with forward, neutral, and reverse.
Electric start.
So - a heap of work to do.
Much thinking so far, and much more to do.
I’m looking forward to starting the actual physical build. The running chassis will be easier than the body I feel. I have made complex parts out of fibreglass and carbon fibre previously using various techniques but this will be the biggest I have tried.
Considered aluminium shaping (English Wheel etc) but I think I’d drive myself mad with both the process and the gear I would end up buying and then needing space for storage. A bridge too far I fear.
Anyway, that’s it for the moment. Not sure if I have posted this in the correct place - it’s my first venture into public forums.
I will attempt to post developments, musings, and photos over time.
Cheers for now. Trust you have a great day and enjoy thinking, making, talking and driving. I just hope I get to that final stage!
SouthieComments (2)-
Hi Southie, welcome to the group!
Looking forward to following the build of your W154.
If you have any questions, don't be afraid to reach out. If More ... -
 Thanks Pete👍
Post is under moderationStream item published successfully. Item will now be visible on your stream. -
-
Pete_R commented on this post about 3 months agoHey Pete you sent me a message now I cant find it ,could you resend pleaseComments (1)
-
resent the message. Or if it is easier send me an email at nsw@cyclekarts.org.au and we can go from there
Post is under moderationStream item published successfully. Item will now be visible on your stream. -
-
Kingshill reacted to this post about 2 months ago
 Comments (6)
-
Wow Phil. Looks awesome. Well done. Got to be pleased with that.
-
That is absolutely wicked. Nice work Phil
-
 Next, Nerf bars front and rear?
 -
Made rear but I think they look too fat need small OD
-
Same diam. as your suspension wishbones should look OK!.
Post is under moderationStream item published successfully. Item will now be visible on your stream. -
-
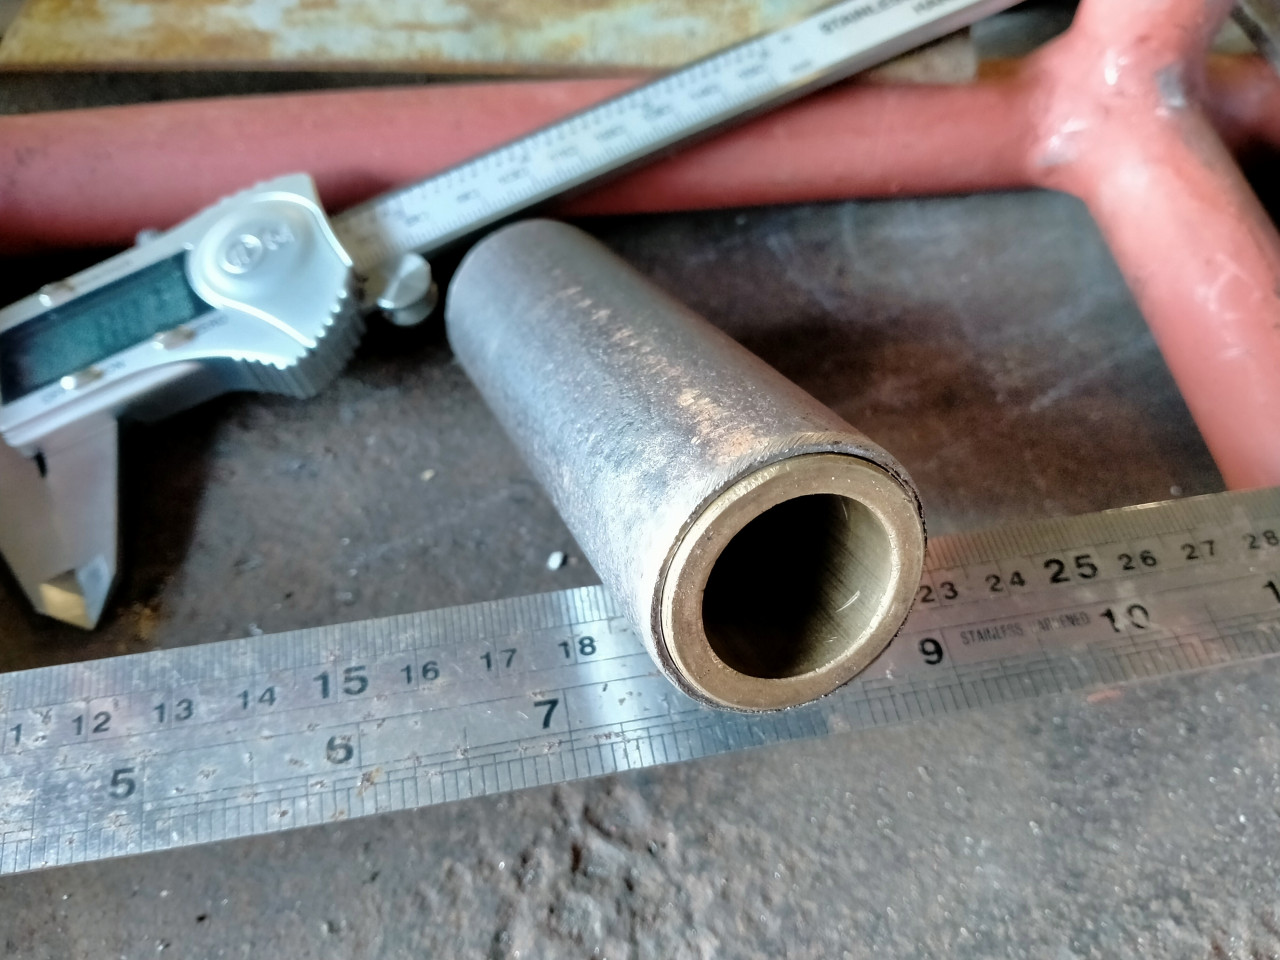
Pursang's "Vintage Morgan" Inspired 3 Wheeler. commented on this post about 3 months agoBrass bushes fitted into the sliding tube parts of the stub axles. Bored with my little lathe.
Pillars cut to length. One of those things that just accidentally worked out well,
the cut off point required the friction disc up against the welded on travel limiter.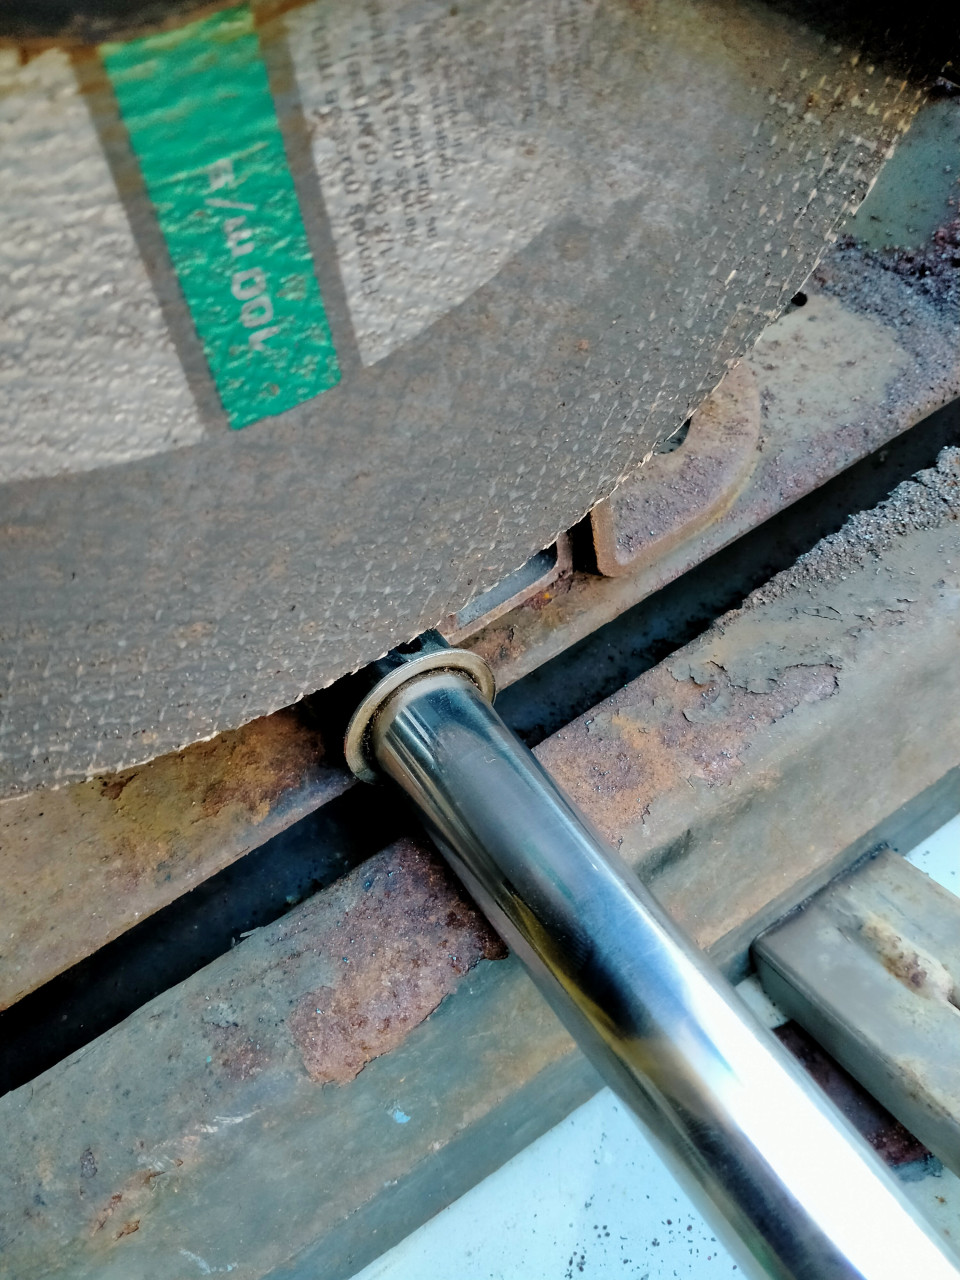

 Comments (3)
-
Nicely done
-
Thanks Mick. Now, in an example of reality & honesty seldom seen on the internet (where everything seems perfect), I have a confession to make:
After More ... -
Moral of this story: Cut Once.....Kick yourself in the butt 3 times!
Post is under moderationStream item published successfully. Item will now be visible on your stream. -
-
Follow our Facebook page and connect with other Cyclekartistes
-
Pursang reacted to this post about 4 months agoI took my Frazer-Nash up to Kapunda with the Vintage Speedway Association last Suday for their "test and tune" day, alas I only got one lap in, going like the clappers on the first lap, drifting a little around the top bend and my torque converter self destructed ......back to the workshop !Comments (1)
-
Great that you got out and about but a shame about torque converter! Onwards and Upwards I guess
Post is under moderationStream item published successfully. Item will now be visible on your stream. -
-
Pete_R commented on this post about 4 months agoThese might be interesting to some builders. 19mm x 35 X 11 bearings.
Because I'm building my own stub axles these bearings will allow me to fab them with HD 19mm axles.
So long as they are not made out of Chinese cheese they will be great.
Of course, at less than $2 ea. they could be replaced after each meeting!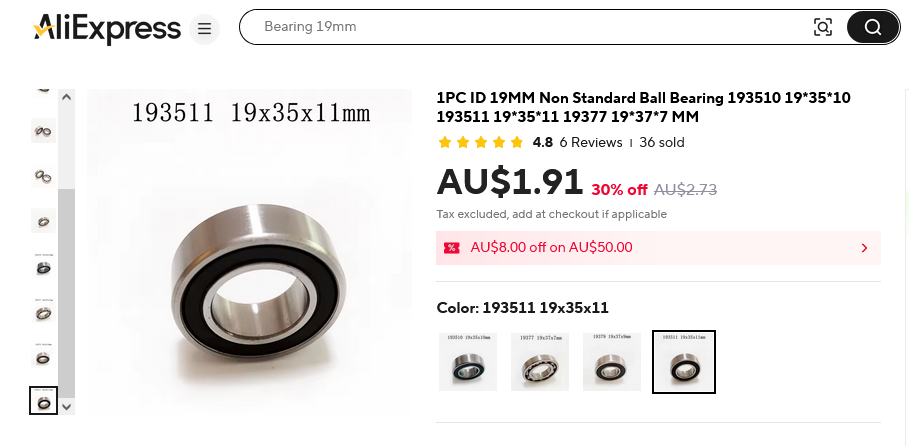 Comments (1)
-
I did similar with 17mm ID bearings. But at that price you would be crazy not to try them! Let us know how they turn out
Post is under moderationStream item published successfully. Item will now be visible on your stream. -
-
Stream item published successfully. Item will now be visible on your stream.
-
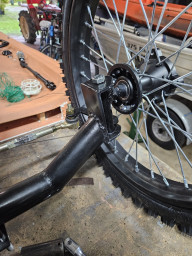
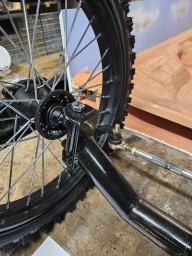
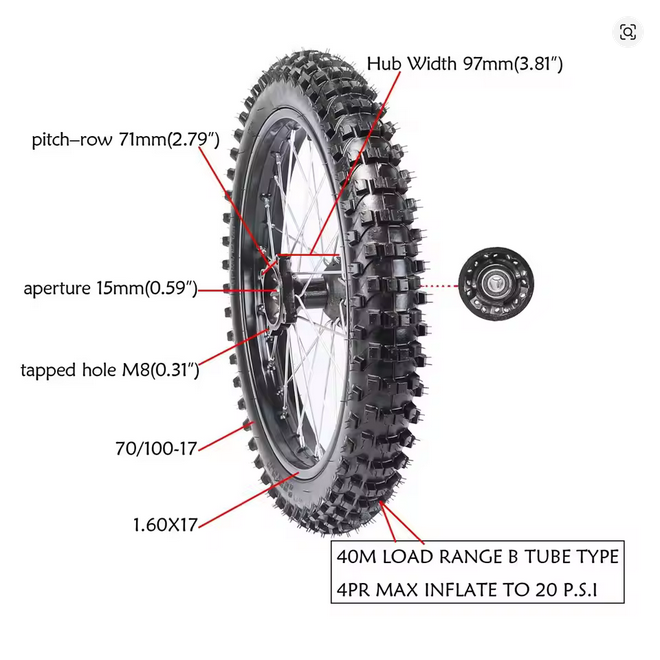
CKAlexander commented on this post about 2 months agoMy front wheels have arrived. Chinese dirt bike, nice quality.....and the price... around $54 ea. with free shipping. Whoo Hooo!
These were on Aliexpress, you need to spend a fair bit of time sussing out the bargains and pay particular attention to the shipping cost.
Bit of tension while monitoring the tracking, they were held up at Chinese...My front wheels have arrived. Chinese dirt bike, nice quality.....and the price... around $54 ea. with free shipping. Whoo Hooo!More
These were on Aliexpress, you need to spend a fair bit of time sussing out the bargains and pay particular attention to the shipping cost.
Bit of tension while monitoring the tracking, they were held up at Chinese airport for a couple of weeks to get on special "oversize'" freight flights.
I actually got some discount vouchers because of the delays.
My original plan was to build my own wheels around some nice 1970's Yamaha MX hubs I have. Then sourcing the 17" rims and custom spokes, tyres, tubes and rim bands, add the time to assemble and true and we are looking at hundreds & hundreds of $$$$$ for 2 wheels.
Now that I have the wheels, I can finish the pillar spacing and the stub axle design to meet the track width spec.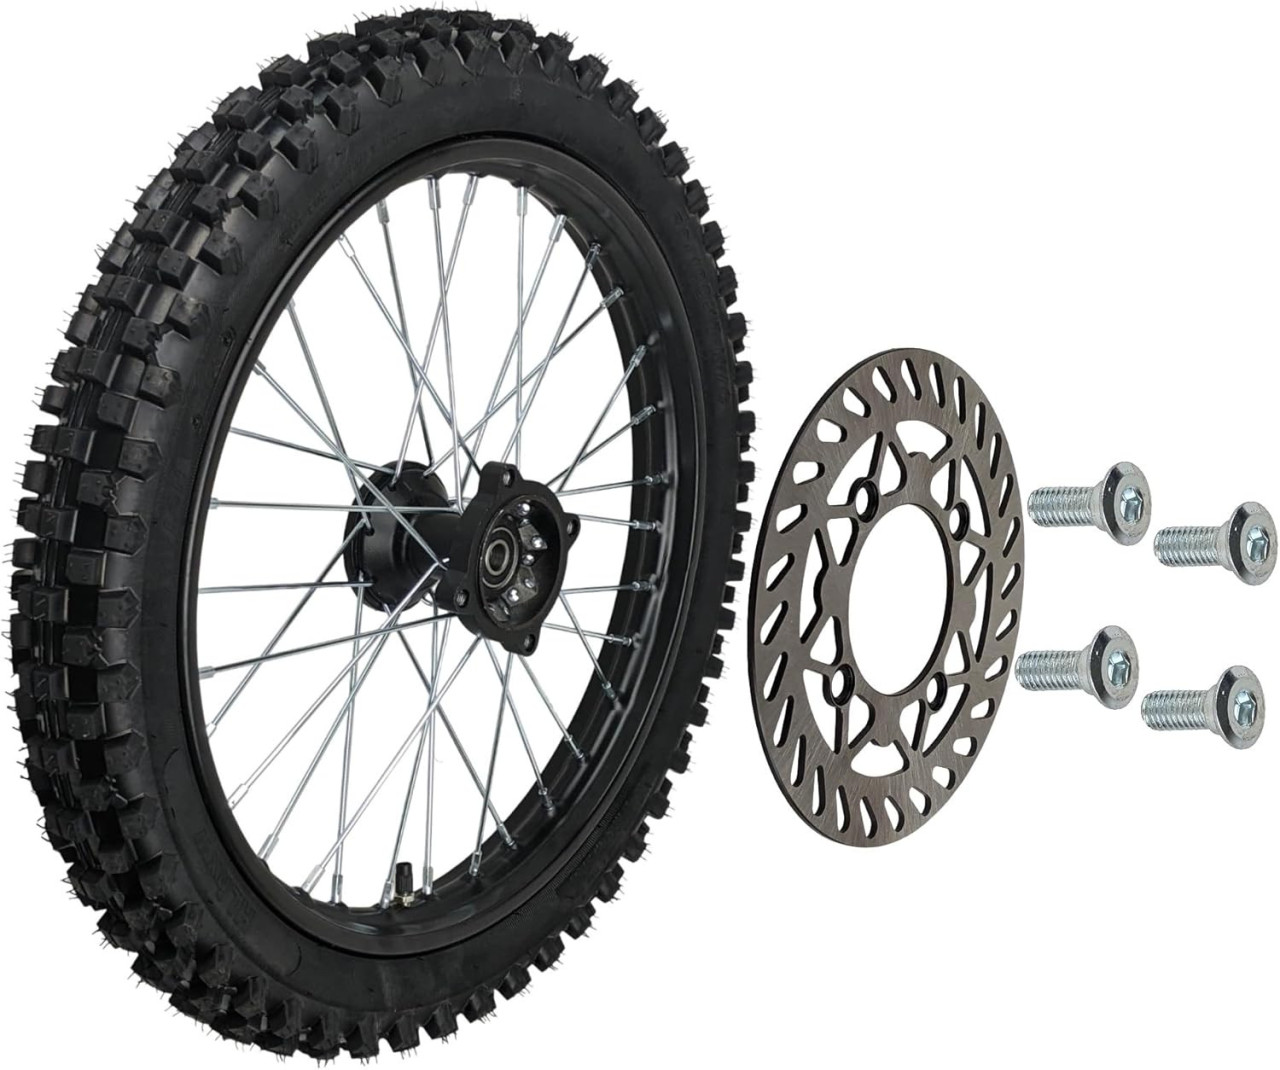
 Comments (5)
-
That's really reasonable, especially with the free shipping.
-
Nice. New parts day is the best day of the week
-
 Hi, can you please post the aliexpress ad? Thanks
 -
CKAlexander The ads and deals change almost daily. Takes patience and constant attention to find absolute bargains.
Here is a cheap 17" pitbike More ... -
Pursang Great thanks.
Post is under moderationStream item published successfully. Item will now be visible on your stream. -
-
phil33 commented on this post about 4 months agolike the Z`ed frame ,its what I should have done . Hindsight is 20 20 vision.Comments (3)
-
me too! I originally built a straight ladder frame. I thought it was good to go, then work out because I was using pillow block bearings for the rear More ...
-
Haha, same here. Having the zee'd chassis with pillow block bearings allows easier rear axle removal compared to running the axle through the chassis More ...
-
Post is under moderationStream item published successfully. Item will now be visible on your stream. -
-
Mick commented on this post about 4 months agoLooking to revive my dream of building a cycle kart with my grandson. The 3 wheeler I initially dreamed of proved too complex so I'm toying with the idea of battery power. I sold the parts I had gathered so its a fresh start. At least I still got my tools. I could really do with a dimensioned plan for chassis if anyone has one.Comments (1)
-
There's some basic dimensions in the resources section under 'plans' that outline a 'traditional' Stevenson style build. This is a pretty good More ...
Post is under moderationStream item published successfully. Item will now be visible on your stream. -
-
Stream item published successfully. Item will now be visible on your stream.
-
 Post is under moderationStream item published successfully. Item will now be visible on your stream.
 -
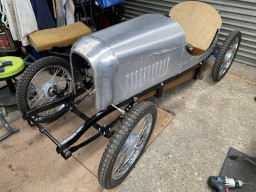
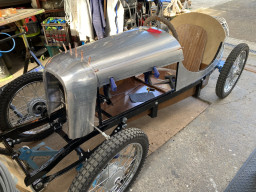
Pete_R reacted to this post about 4 months agoLots going on behind the scenes, but here is some visual evidence of progress. Front sub-frame assembly welded.
 Post is under moderationStream item published successfully. Item will now be visible on your stream.
 -
Stream item published successfully. Item will now be visible on your stream.


There are no activities here yet